Photoshop tools help you edit and modify images. They offer features to enhance designs. Turn simple edits into stunning transformations on any photo. We specifically mention raster images here. Photoshop tools work best with this. We will learn about the tools that are mostly used.
Adobe Photoshop Tools | Tools in Photoshop
Adobe Photoshop is an amazing software to manipulate photos just in any way you can think of. Photoshop feels tricky if you don’t know its basics. In today’s presentation, I will give you a brief on Photoshop tools in detail. We have another blog that contains new features for this version.
A. Basic Photoshop Selection tools
Talking about selection tools is one of the mandatory sections in Photoshop. Any editing in a specific area or replication, the addition you need, the selection is a must. You will have a better idea during your work in action. We have a complete blog on isolating a subject from the background using selection tools. So, check out, “How to do Photo Cut Out easily in Photoshop” to know more. Photoshop CS6 tools make it easy and effective to make selections. Here, we will introduce you to the tools only.
01. Move Tool
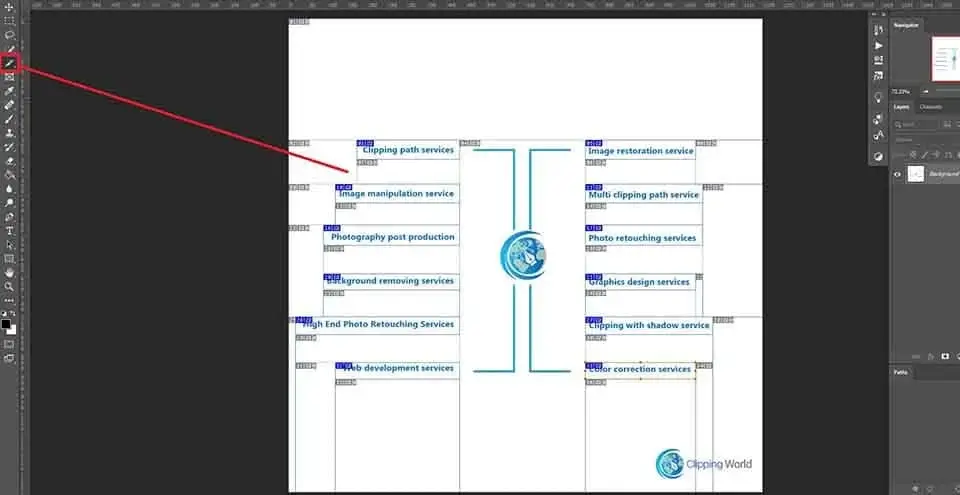
Photoshop tool’s definition starts with this one. The Move tool is not directly a selection tool but has great intimacy with them. You can click and drag any image in a project with this one. Use the mouse to do the operation easily. Use the keyboard key ‘V’ to choose the tool as a shortcut.
02. Marquee Tools
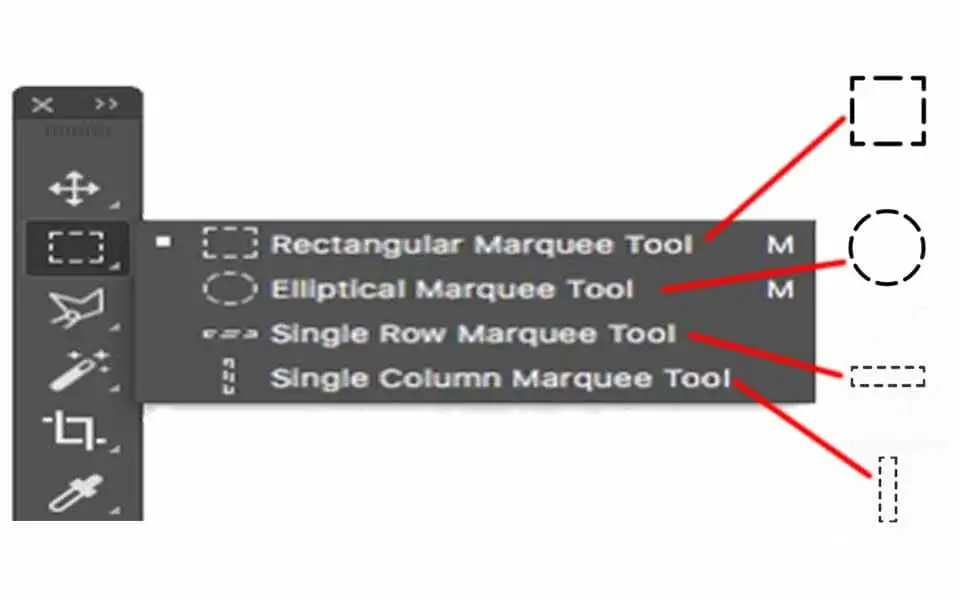
Tools that we use with basic shapes are called Marquee tools. You can use them when you have a subject or any specific part of an image matching this. The tools are four in number. See below for details about them.
- Rectangular Tool: The Rectangular tool we use to select a square or rectangular area of a photo. To maintain the aspect ratio in the selection press and hold the Shift key for both Win and MAC. Click and drag from one end and release when you have the area you want to mark.
- Elliptical: It’s used for circular and oval selections. Press and hold the Shift key for both Win and MAC to maintain the aspect ratio as above.
- Single Raw: We use the Single Raw Marquee tool to select a single row of an image pixel.
- Single Column: This Marquee tool you can use to select a single column of an image pixel.
03. Lasso Tools
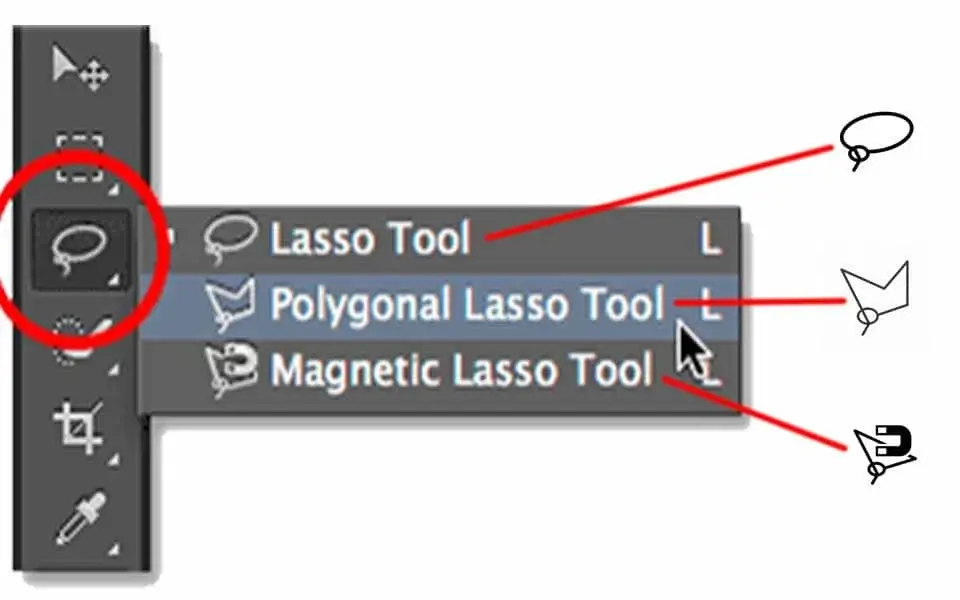
You can use the Lasso Tool to create irregularly shaped selections. It includes the lasso for automatic selections. A polygonal lasso tool is used to make selections by drawing a series of strength lines to make a polygonal shape. Another lasso tool is the magnetic. In this tool, you click within the image to start or create your selection and drag the mouse to create a selection path
04. Crop Tool
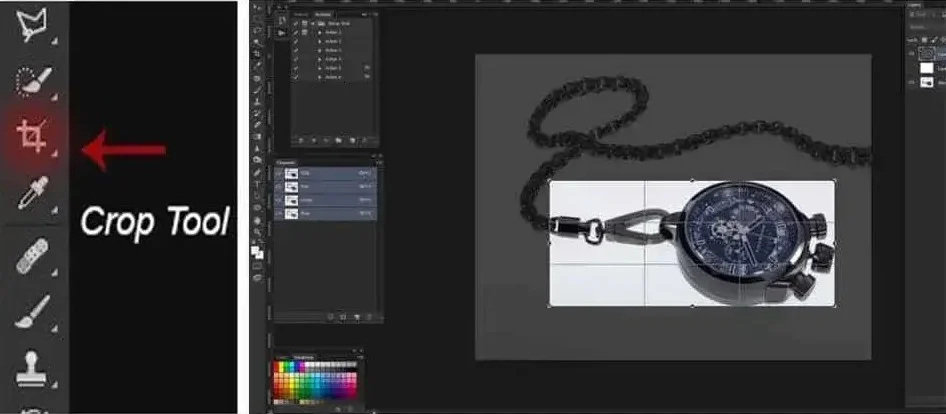
The Crop tool as the name suggests used to crop images. Crop the whole image and manage the visible area with this one. You can activate the Crop tool by pressing (C) on the keyboard or see the image below for the crop tool icon.
B. Image Editing Tools
Photoshop tools and functions Some of the broadly used Photoshop Tools are given below.
01. Spot Healing Brush Tool
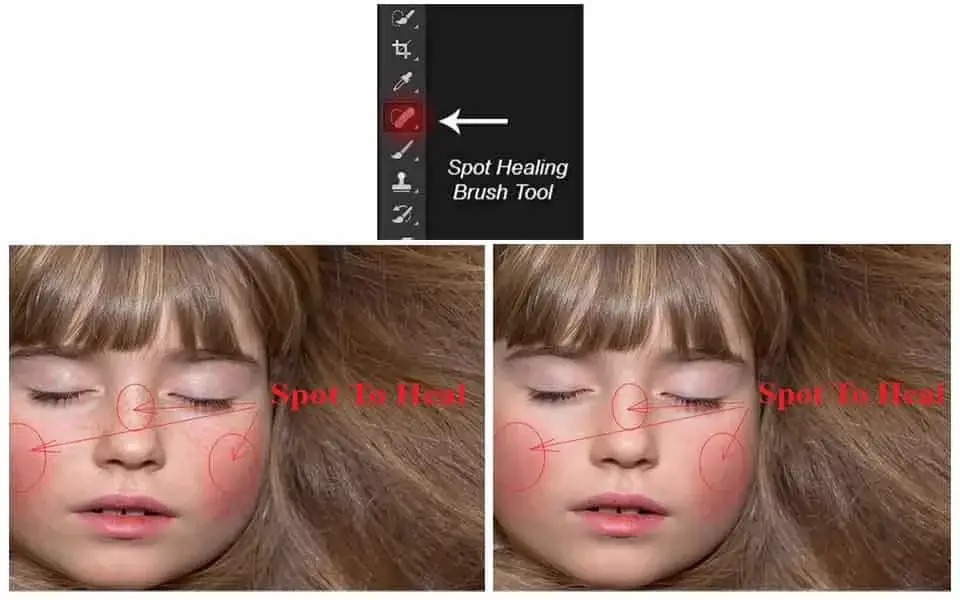
Removing spots or stains from fabric is easy with detergent or chemicals. But, what would you do when it comes to removing sports from an image? Photoshop CS6 comes with the Spot Healing Brush Tool as a rescue. Well, this was available in some previous versions as well. Use the keyboard key ‘J’ to select the tool. The operation is pretty simple. Just brush over the impure areas and see the changes.
02. Pen Tool (P)
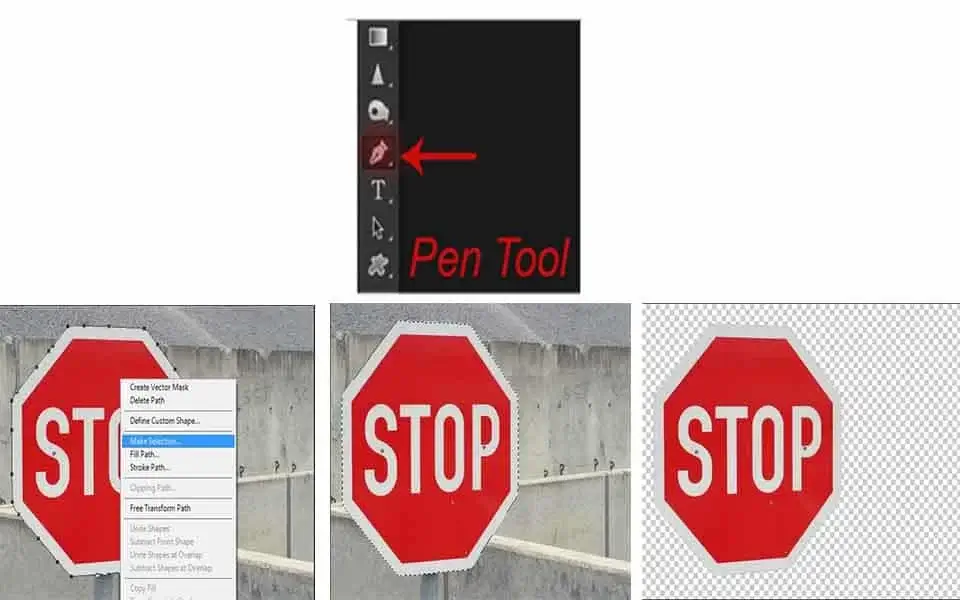
The Pen tool is legendary in the Photoshop toolbar. You can create a work path and make a selection for further activities. The best part is, that you can make the path as you wish. Creating straight lines is very simple. Click once to start the path and go for the next one. You will see a straight line. Click and drag a bit if you want to draw a curved line. We have a complete guide on the Photoshop Pen tool.
03. Brush Tool (B)
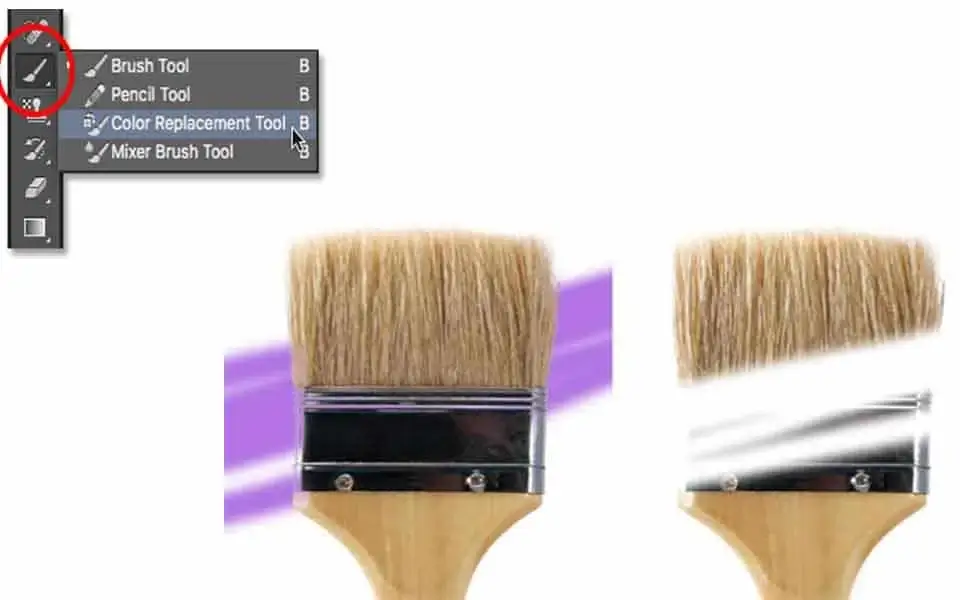
Like the Pen tool, the Brush tool is also quite remarkable. You can draw, use color, hide/unhide areas in the mask, or use it with multiple tools. The shortcut to selecting the tool is ‘B’. You can make the brush bigger or smaller. You can also make it hard or soft whenever you need to.
04. Clone Stamp Tool (S)
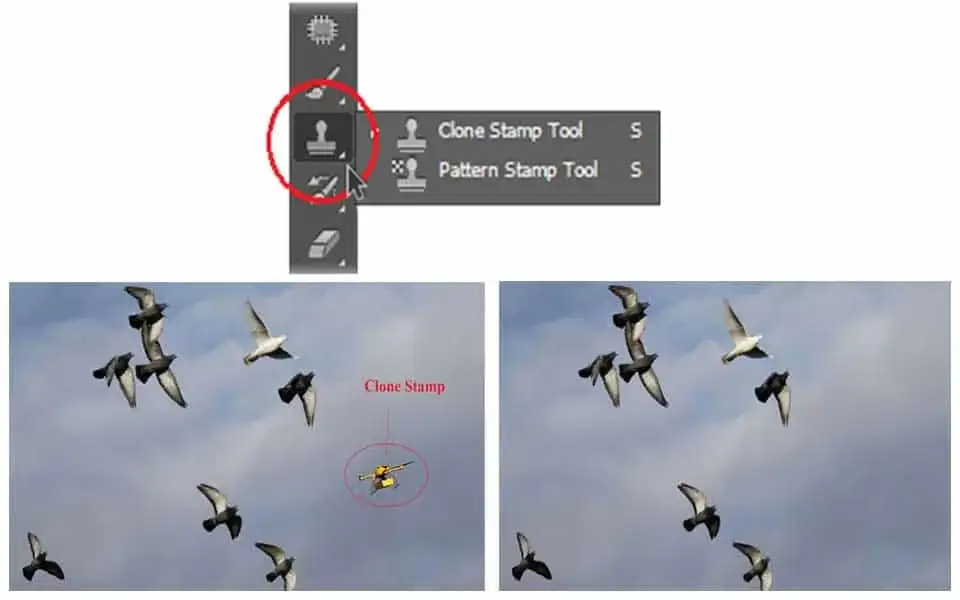
Have you heard of cloning? Creating a copy of an existing creature with the DNA is cloning. The Clone Stamp tool follows a similar method for photo editing. Here, you cannot create a creature but you can replicate an area from one place to another in photos.
Mastering the Clone Stamp Tool allows you to do advanced image retouching and manipulation. Use the keyboard shortcut ‘S’ to select the tool. Take a sample by pressing Alt/Option for Win/MAC and click at the point. Release Alt/Option and brush over the area where you want to apply. As simple as that.
05. Eraser Tool (E)
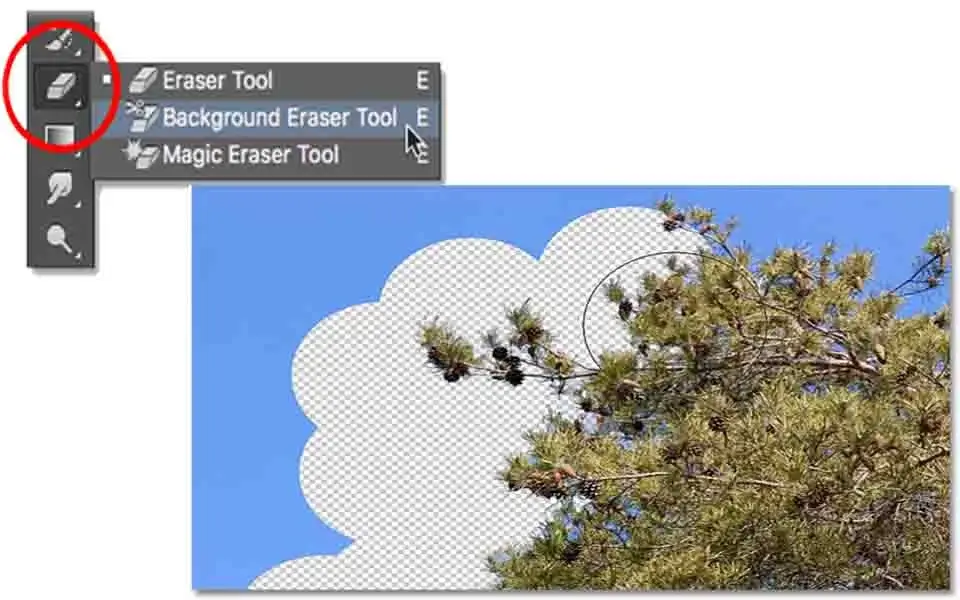
You need to use the Eraser tool when it comes to vanishing something from the whole image. Working on a layer, the tool works as making an area transparent. Press ‘E’ to select the tool then select the layer where you need to use it. Brust over the area and you will see the below layer is becoming visible.
06. Blur Tool (R)
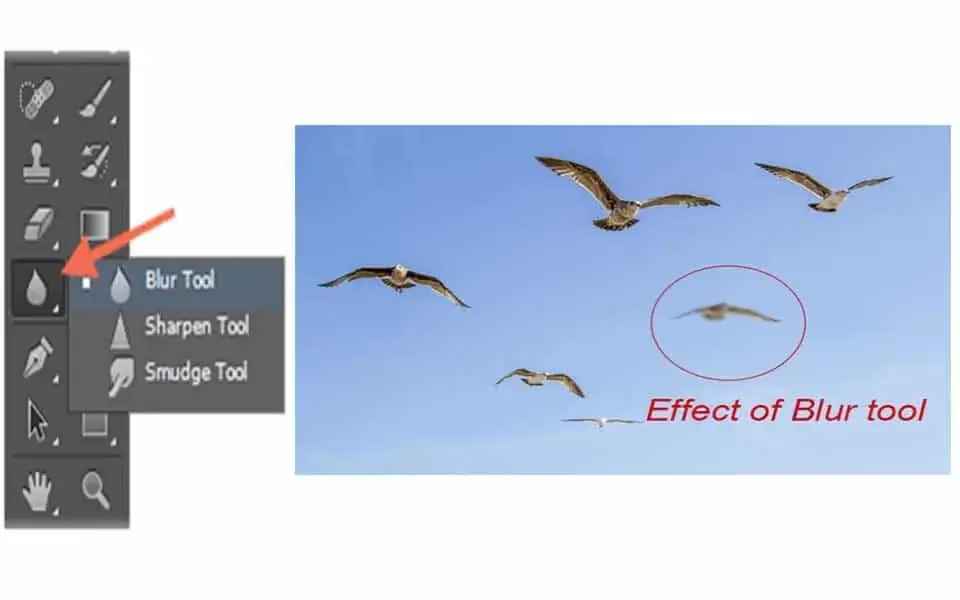
Photoshop Blur tool is something that we use for artificial blur. The Blur tool is cool. It makes things blurry. Click and drag over the image or any specific section to make things blurry. The more you click and drag, the more blur you get. Use the keyboard command ‘R’ to select the tool.
07. History Brush Tool (H)
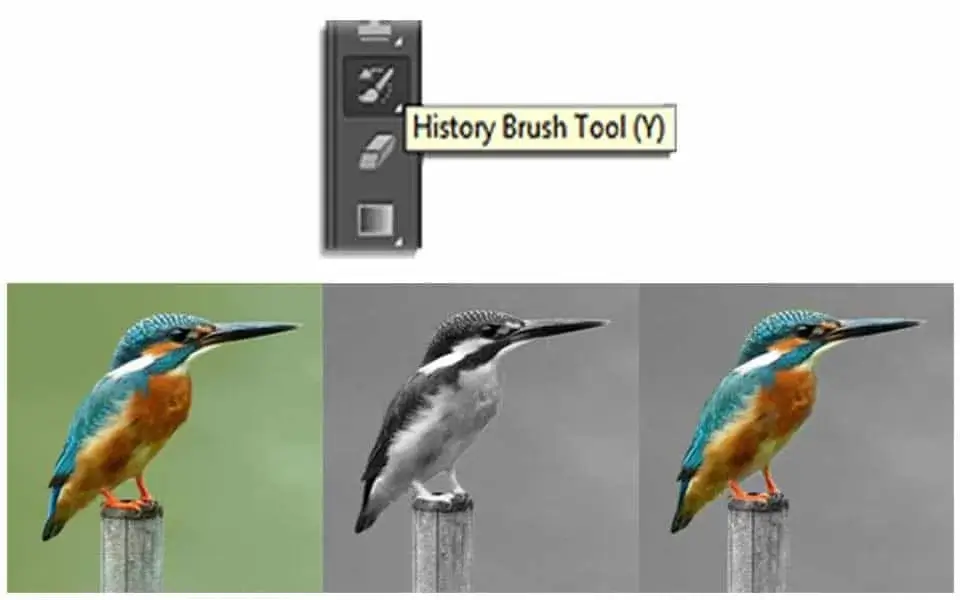
This tool works just like the Brush Tool except for the information that it paints with is from the original state of your image. If you go to Window>History, you can see the History Palette. The History Brush tool paints with the information from whatever History state is selected.
08. Rectangle Tool (U)
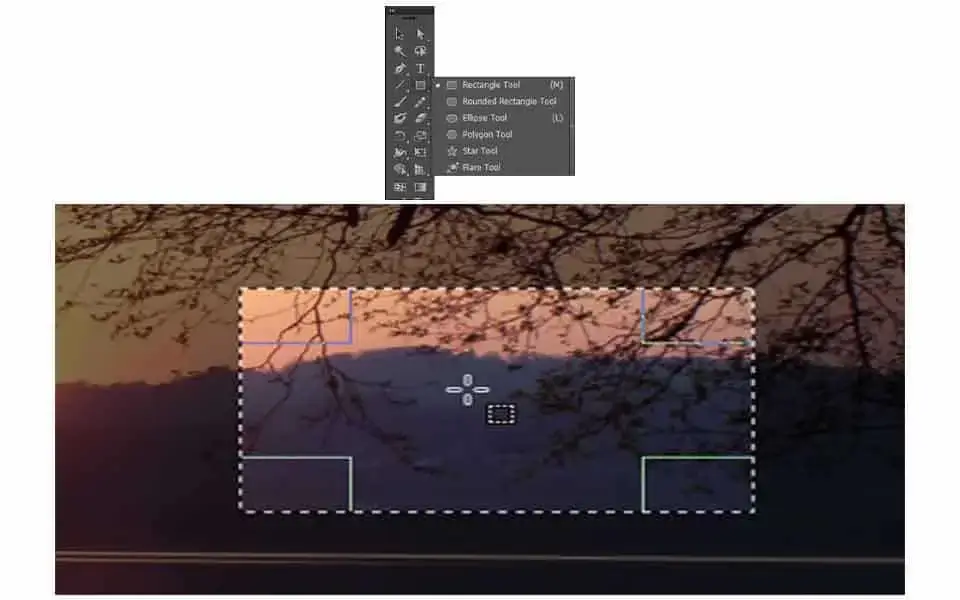
By default, it draws a Shape Layer in the form of a rectangle. Fill up the foreground color according to your selection. You can use this tool to create squares as well. Also, you can access some more shapes in this group. Activate the Rectangular tool by pressing ‘U’ for both Windows and MAC operating systems.
09. Eyedropper Tool (I)
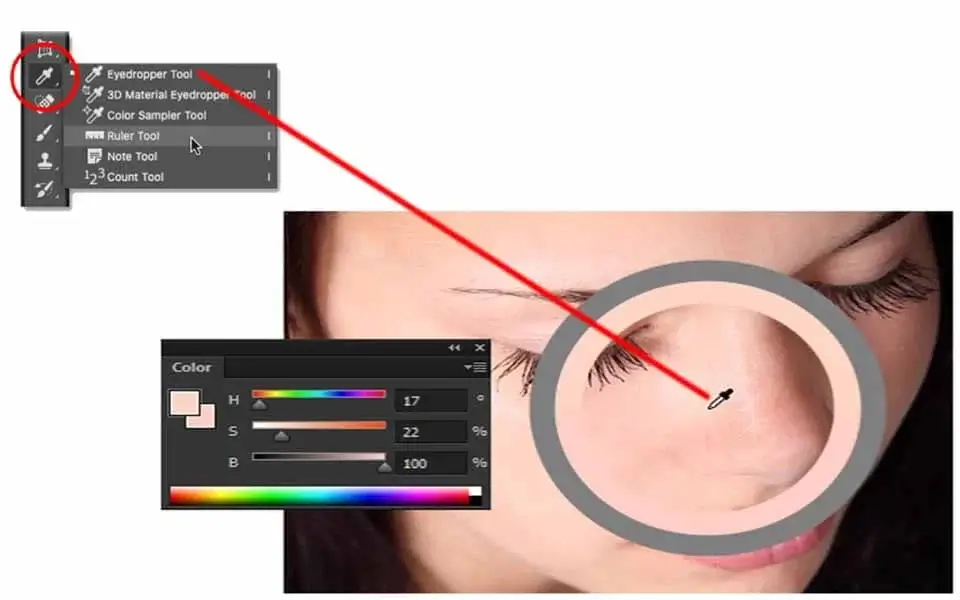
The Eyedropper Tool is the key to picking a color that you will get in the toolbar in Photoshop. The tool works by changing your foreground color to whatever color you click on. Holding the [Alt] key will change your background color. You will see the foreground and background color options in the lower portion of the toolbar.
10. Zoom Tool (Z)
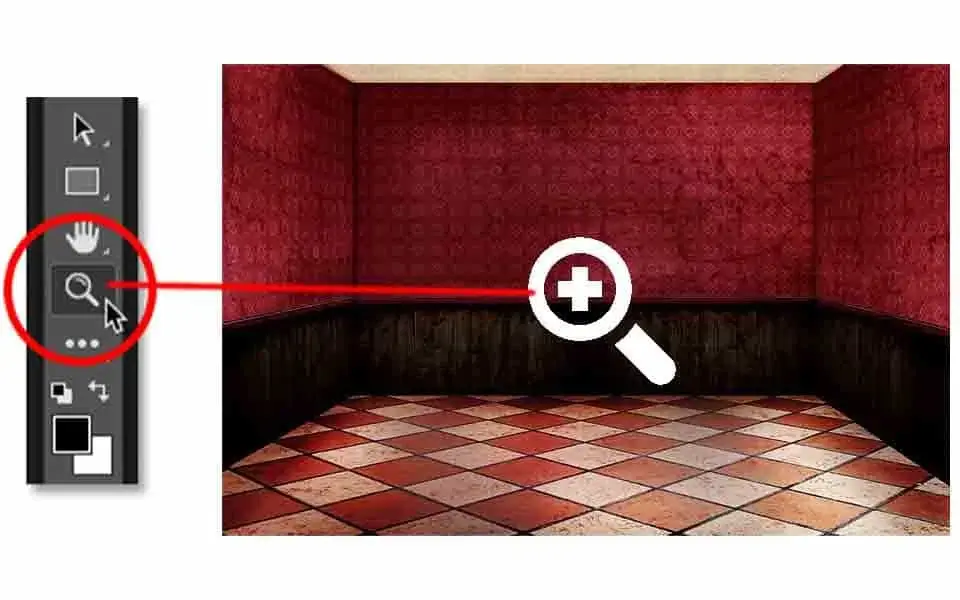
The Zoom Tool you can use to magnify the image you are working with. Well, it is very important to see the details during editing. As raster images are made of pixels, working perfection depends on proper observation of the image. Use the keyboard key ‘Z’ for both Win and MAC to select the tool. Click on the image to enlarge as many times as you need. Press and hold Alt/Option for Win/MAC and you will see the ‘-’ (Minus) sign in the cursor. Then click to zoom out when you need to.
11. Slice Tool (K)

Need to divide an image and save it separately, you need to use the Slice Tool. You can have the tool by using the keyboard key ‘K’ for both Windows and MAC. The other way is, to click and hold on to the Crop tool in the toolbar until you have other options. Now, release the click and click on the Slice Tool. You can use this amazing tool to mark and separate multiple areas from an image.
Just click and drag an area that you want to slice, and release when you are satisfied. Right-click on the selected area to edit information for the selection. You can rename, add links, and do more here. Go to File > Save for Web, click Save, and choose the location. You will have the images sliced according to your selection.
Conclusion
Photoshop CS6 is a heavily loaded photo editing software you can use for your image manipulation. All the tools and options are hard to explain in a few words. So, we tried to mention a list of Photoshop tools here. However, some other tools are close to these that we mentioned here. We will come again with them from time to time. However, the uses of the tools need some knowledge and practice. If you are a beginner, we believe this content will be of help. Try them and deliver with expertise with the skill you have within.

