Removing a background in Adobe Photoshop is easier than ever thanks to built-in AI tools and precise manual methods. Whether you need a one-click automatic cutout, a fast shortcut workflow, or a professional-quality product photo edit, this guide shows you how to remove background in Photoshop step by step for clean, accurate results.
Quick Answer
The fastest way to remove background in Photoshop is using the Remove Background button in the Properties panel. For more control, use Select Subject, Quick Selection, or the Pen Tool for precise edges.
If you specifically want to keep the background transparent instead of just removing it, follow our complete guide on how to make a background transparent in Photoshop.
What Is the Best Way to Remove Background in Photoshop?
The best way to remove a background in Photoshop depends on the image type and edge detail:
- Simple background? Use the Remove Background button (AI automatic)
- Hair or fur? Use Select & Mask
- Product photos? Use the Pen Tool for precise edges
Quick edits? Use Select Subject + Layer Mask
Quickest Way to Remove Background in Photoshop (One Click)
This is the easiest and fastest method.
Step-by-Step
Step 1: Open your image in Photoshop
Step 2: Select the image layer
Step 3: Go to Window → Properties
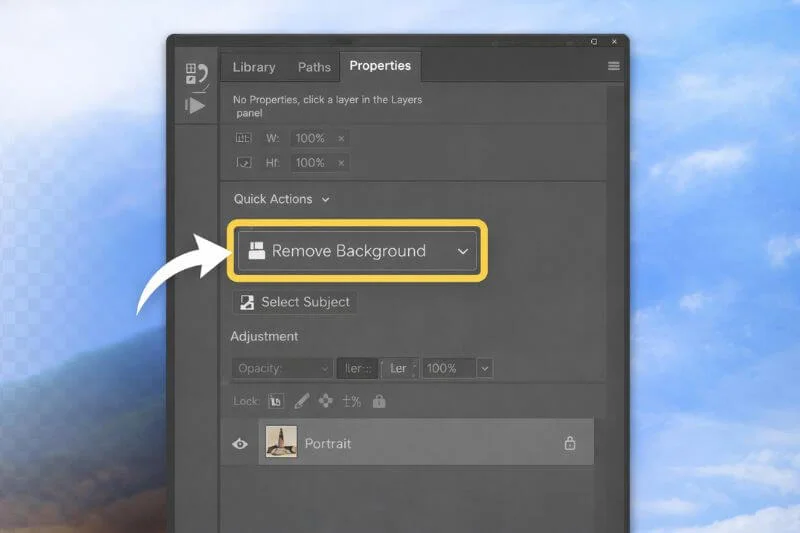
Step 4: Under Quick Actions, click Remove Background
Photoshop will automatically detect your subject and apply a layer mask.
Best for: Clear subjects with simple backgrounds
Not ideal for: Fine hair details or complex edges
Photoshop Background Removal Shortcut (Fast Manual Method)
If you want speed with a bit more control, use this shortcut workflow to quickly select your subject and remove the background with better accuracy.
Useful Shortcuts
| Action | Shortcut |
| Quick Selection Tool | W |
| Brush Tool | B |
| Select & Mask | Ctrl + Alt + R (Win) / Cmd + Option + R (Mac) |
| Deselect | Ctrl + D (Win) / Cmd + D (Mac) |
Fast Method Steps
Step 1: Press W and select the Quick Selection Tool
Step 2: Click Select Subject in the top menu
Step 3: Click the Add Layer Mask icon
Step 4: Open Select & Mask to refine edges
This method is ideal when you need better accuracy than the one-click option.
Remove Background Using Quick Selection Tool
This beginner-friendly manual method shows how to remove the background in Photoshop using the Quick Selection Tool. It gives you more control than the one-click option and works well for most everyday images with clear subject edges.
Step 1: Open the Image
Go to File → Open and select your image.
Step 2: Select the Background
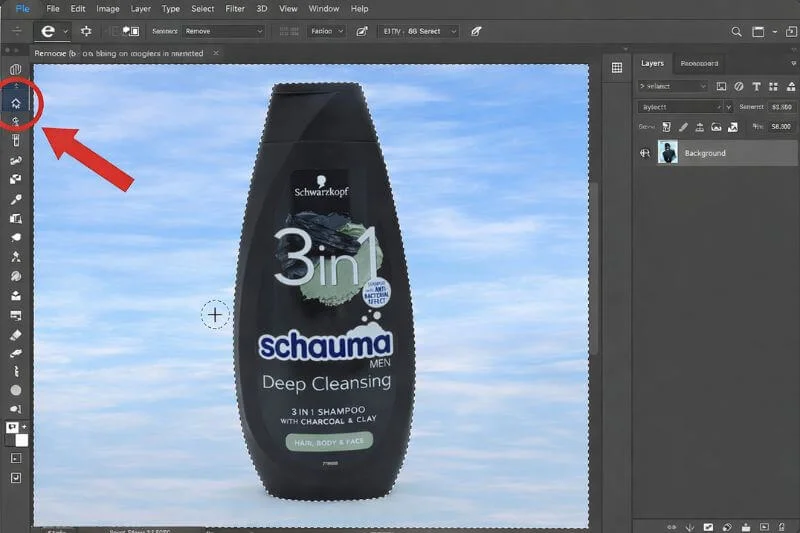
Choose the Quick Selection Tool (W) and drag over the background. Photoshop will detect edges automatically. If the subject gets selected instead, go to Select → Inverse.
Step 3: Add a Layer Mask
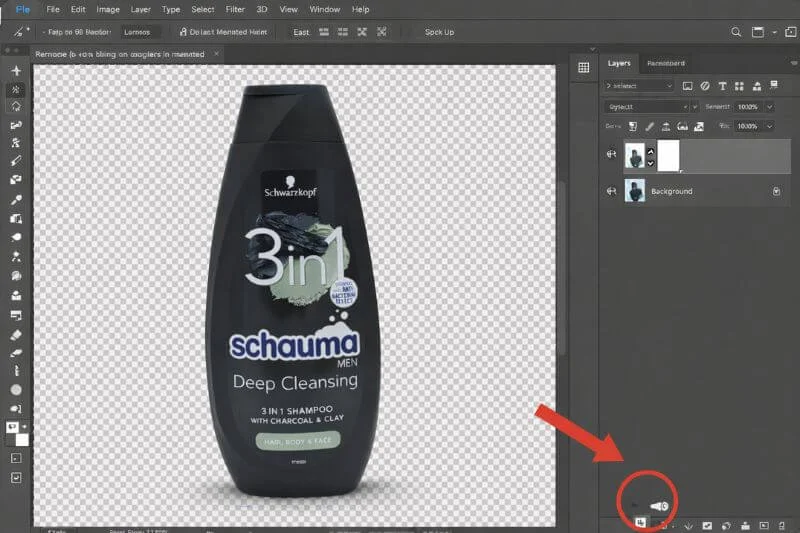
In the Layers Panel, click the Add Layer Mask icon. The background will disappear.
Step 4: Clean Up Edges
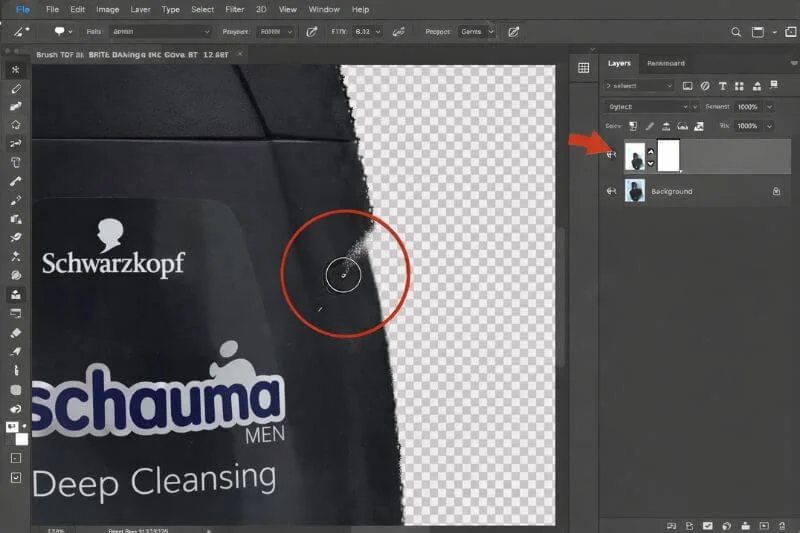
Select the mask thumbnail and use the Brush Tool (B):
- Paint black to hide background leftovers
- Paint white to restore details
Step 5: Export with Transparent Background
Go to File → Export → Export As, choose PNG, and enable Transparency.
Need a full walkthrough on saving and using transparent images? Here’s a step-by-step guide on making a background transparent in Photoshop.
Pro Tip
Zoom in to 100% and carefully check the edges of your subject before exporting. Small leftover background spots or rough edges can be cleaned up using a soft brush on the layer mask for a more professional result.
Final Check Before Exporting
Before saving your image, zoom in and inspect the edges to ensure the background is completely removed. Refining the mask with a soft brush helps create cleaner cutouts and more professional-looking results.
Once your background is removed, you can use the image in layout software. Here’s how to create a clipping mask in InDesign for professional print and brochure designs.
Best Tool to Remove Background in Photoshop (Comparison)
Choosing the right tool to remove a background in Adobe Photoshop depends on the image type and the level of detail required. Some tools work best for quick edits, while others are designed for precise, professional cutouts. The comparison below helps you understand which Photoshop background removal tool is best for your needs.
| Tool | Best For | Skill Level |
| Remove Background Button | Quick edits | Beginner |
| Quick Selection Tool | General use | Beginner |
| Select & Mask | Hair and soft edges | Intermediate |
| Pen Tool | Product photos, sharp edges | Advanced |
As you can see, there is no single “best” tool for every situation. The Remove Background button is perfect for fast results, while Select & Mask helps refine tricky edges like hair. For ecommerce and product photography, the Pen Tool remains the most accurate method for achieving clean, professional background removal.
Professional Method: Removing Background from Product Photos
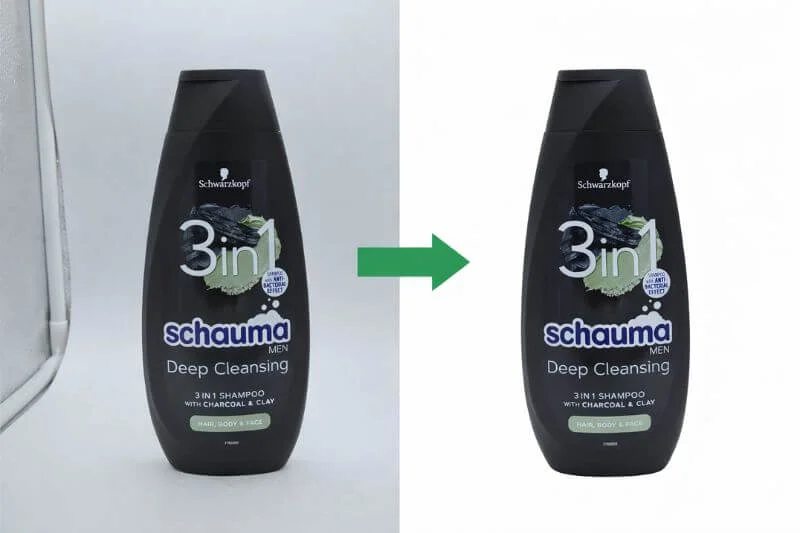
For ecommerce and catalog images, professionals use the Pen Tool to create a precise clipping path that delivers ultra-clean edges and perfectly isolated products on pure white backgrounds.
This technique creates high-precision image cutouts commonly used in e-commerce product photography. For a beginner-friendly walkthrough, see our guide on photo cutout techniques in Photoshop.
Why This Method is Best
- Ultra-clean, sharp edges
- Ideal for white or transparent backgrounds
- Required for many ecommerce marketplaces
At Clipping World, this is the standard technique our professional editors use to deliver clean, accurate, and production-ready background removal services for ecommerce and commercial use, ensuring consistent edges, natural-looking cutouts, and images that meet marketplace quality standards.
How to Add a New Background
After removing the background:
Step 1: Click the Adjustment Layer icon
Step 2: Choose Solid Color
Step 3: Pick your new background color
Step 4: Drag the color layer below your subject layer
You can also add gradients, textures, or photos as new backgrounds. This tutorial focuses on Photoshop techniques, but background removal also involves different methods, tools, and use cases, as explained in our background removal main guide.
FAQs About Removing Background in Photoshop
Yes. The Remove Background button in the Properties panel uses AI to automatically separate the subject.
The fastest manual workflow is Select Subject + Add Layer Mask.
The Pen Tool gives the most precise results, especially for product photos.
Hide or delete the background layer and export the image as a PNG with transparency enabled.
Use Select & Mask → Refine Edge Brush Tool to improve fine details like hair and fur.
Conclusion
Now you know the best ways to remove a background in Photoshop — from one-click automatic tools to professional precision methods. Choose the method that matches your image complexity and editing needs.
If you need perfect, production-ready cutouts for ecommerce or bulk images, professional background removal services from Clipping World can save time and ensure consistent quality.
Related Background Editing Tutorials
Want to learn more photo editing techniques? Check out these helpful background and Photoshop tutorials to improve your skills and create more professional-looking images.