
Can a professional photo cutout for product photography improve your images? Absolutely. These services make your products stand out by removing or replacing backgrounds, creating clean, high-quality visuals. They also ensure consistency across all photos while saving you time and effort.
In short, using background removal and image isolation techniques is essential for professional product photography. Whether you’re a photographer or business owner, knowing how to leverage photo cutout services can improve your brand’s visual presentation and boost customer engagement.
Uses of a Photo Cutout in Product Photography
A reliable photo cut out service can help product photography meet its core goal. Here are a few ways these services add value:
- Create clean and flawless visuals.
- Capture customer attention and influence buying decisions.
- Produce consistent, eye-catching product listings that boost sales.
- Isolate subjects from complex or distracting backgrounds.
- Strengthen brand credibility through uniform presentation.
- Save time, effort, and production costs.
Categories of Cutout Services for Product Photos
Different editing agencies offer varied levels of complexity in image cutouts. The following table outlines the service categories provided by Clipping World and similar professional editors.
| Features | Basic Photo Cutout | Simple Photo Cutout | Medium Photo Cutout | Complex Photo Cutout |
| Complexity | Suitable for simple shapes with little to no holes. | Ideal for objects with basic curves or a few holes. | Works for products with multiple curves and openings. | Best for intricate images with many holes, curves, or transparent elements. |
| Example Images | Balls, mobiles, eggs, watches | Mugs, t-shirts, shoes, caps | Groups of clothing, footwear | Bicycles, chains, flower buckets |
| Turnaround | Fastest delivery time | Slightly longer than basic | Requires additional time for precise edge selection | Takes the most time due to high detail and transparency handling |
| Price | $0.25 | $0.45 | $0.89 | $1.50 |
How to Edit a Product Photo Using Cutout Techniques
Editing or isolating a product image requires experience and precision. Below are the most common Photoshop methods used to create clean product cutouts.
01. Object Selection Method
This is one of the simplest and most efficient ways to separate your subject from its background.
Step 1 – Open Your Image in Photoshop
Go to File > Open and select your product image.
Step 2 – Duplicate the Background Layer
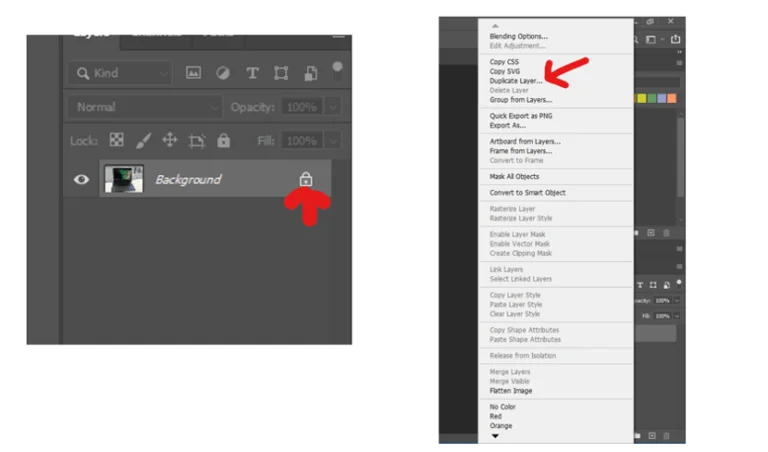
Now duplicate the background layer. So, the original photo will remain safe. To duplicate the background layer, right-click on the background layer from the layers panel. Then, select Duplicate Layer.
Step 3 – Use the Object Selection Tool
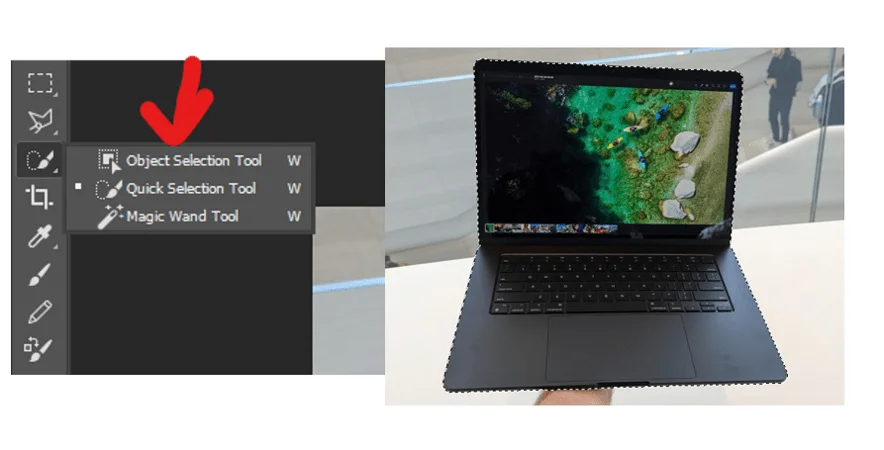
Select the Object Selection Tool from the toolbar. Drag around your product — Photoshop will automatically detect and select the main subject.
Step 4 – Refine the Selection
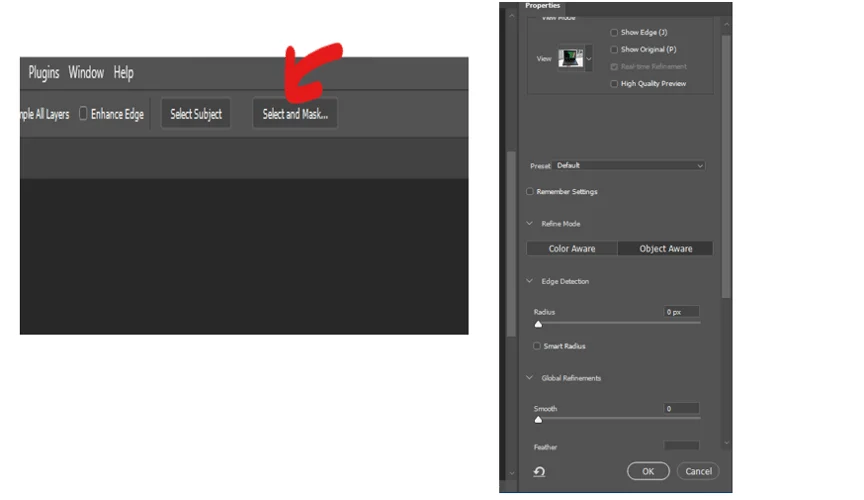
Use Select and Mask from the options bar to adjust smoothness, feather, and edge contrast for a clean outline. Hit OK if the selection is satisfactory.
Step 5 – Create a Transparent Background

Press Ctrl + J (Windows) or Cmd + J (Mac) to move the selection to a new transparent layer.
Step 6 – Change the Background (Optional)
Add a new layer via Adjustment Layer > Solid Color. Choose your preferred background color or texture.
Step 7 – Save the Image
Go to File > Save As and export the file in PNG format for transparency or JPEG for solid backgrounds.
02. Quick Selection Tool
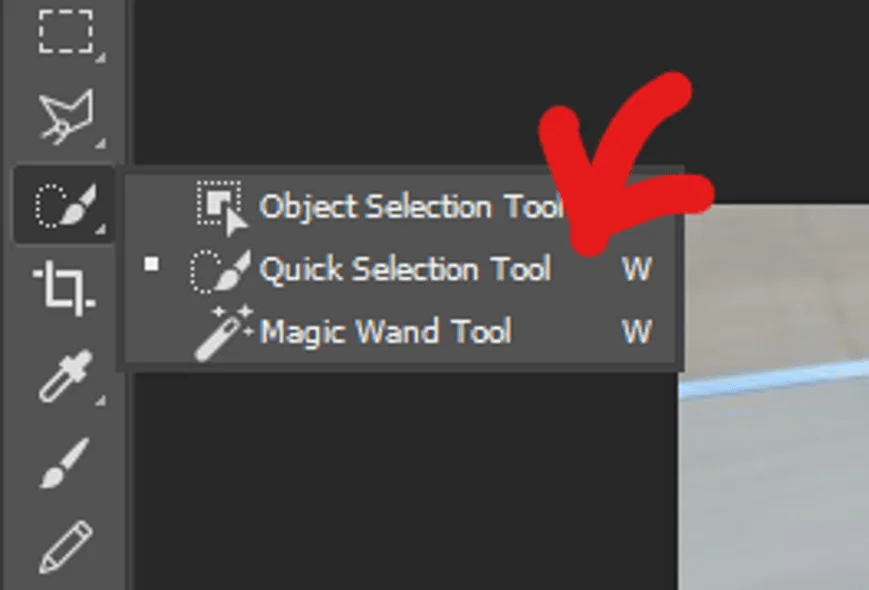
This tool lets you paint over the product area to make an instant selection.
- Choose the Quick Selection Tool from the toolbar.
- Adjust brush size as needed.
- Click and drag over the product to create a selection.
- Use Select and Mask to fine-tune edges if necessary.
- Use Ctrl + J to isolate the product on a transparent background.
03. Pen Tool Method
The first two tools of the Photoshop image cutout are for the basic images. The pen tools are practical for more complex shapes. However, using the Photoshop pen tool is a challenging task. You have to be patient while using this tool. Here is how to use this tool:
Step 1 – Select the Pen Tool

Choose the Pen Tool from the toolbar and ensure “Path” is selected in the options bar.
Step 2 – Zoom In for Precision
Use Ctrl + (or Cmd +) to zoom in and work along the product’s edges.
Step 3 – Draw Anchor Points
Click along the edges of your product, dragging slightly to follow curves.
Step 4 – Complete the Path

Continue placing points until you return to the starting anchor.
Step 5 – Convert the Path to a Selection
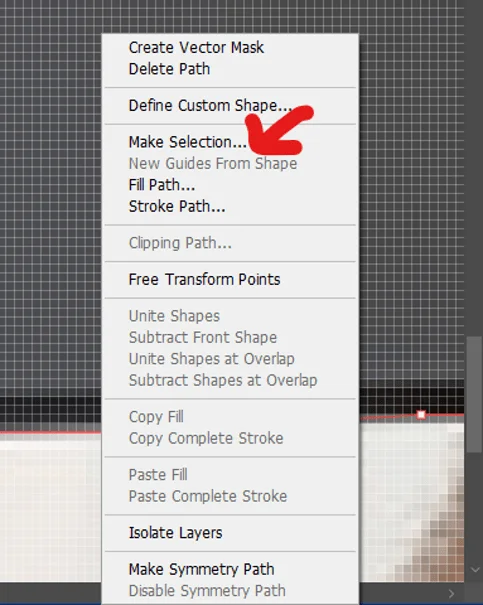
Right-click and choose Make Selection, then press Ctrl + J to isolate it onto a new transparent layer.
Step 6 – Save Your Work
Remove the background layer and save the final image as a PNG file.
How to Choose the Right Image Editing Agency
If you prefer to outsource your photo cutout work, here are some factors to evaluate when choosing a professional editing partner:
01. Define Your Requirements
Estimate the number of images, the desired turnaround time, and the level of precision required for the project. Specify if you need additional retouching or color correction.
02. Ask for Recommendations
Consult colleagues or other photographers who have worked with reliable editing providers. Gather feedback and shortlist potential agencies based on client reviews and experience.
03. Review Portfolios and Samples
Assess sample work or case studies. This helps ensure the agency can meet your expectations for quality and accuracy.
04. Negotiate Terms and Pricing
Discuss delivery schedules, revision policies, confidentiality, and pricing clearly. Make sure the final agreement includes transparent terms with no hidden charges.
Final Thoughts | Photo Cutout for Product Photography
High-quality background removal and image isolation are essential for professional product photography. Clean visuals not only enhance your brand image but also drive engagement and conversions.
Whether you’re an individual photographer or an eCommerce business, using a dedicated cutout service can help you maintain visual consistency, save time, and achieve professional results.
For precise and efficient image editing, consider partnering with a trusted photo editing agency such as Clipping World.
Download Resources
FAQs | Photo Cutout for Product Photography
It’s a specialized branch of photography focused on showcasing products attractively for marketing and sales purposes, including eCommerce and advertising.
Use background removal, lighting adjustments, and image retouching. Clean compositions and consistent backgrounds help achieve a professional finish.
It refers to the process of separating a subject from its background using techniques like object selection, clipping paths, or masking — ensuring precise edges and a transparent background.