Need to remove a photo background using GIMP? This beginner-friendly guide shows you 5 simple ways to create transparent backgrounds for product photos, creative designs, or personal images—using GIMP, the free alternative to Photoshop.
Quick Answer: How to Remove Background in GIMP
To remove background in GIMP and make it transparent, add an alpha channel, select the background using tools like Fuzzy Select, Select by Color, or the Paths Tool, then delete or mask the selection to make the background transparent.
5 Proven Methods to Remove Background in GIMP
Wondering how to remove a background in GIMP? GIMP offers several techniques to make image backgrounds transparent, depending on the type of photo you’re editing. Some methods are quick and beginner-friendly, while others require more precision and practice.
In this guide, you’ll learn 5 simple ways to remove a background in GIMP, with easy step-by-step instructions for different kinds of images.
Method 1: Using the Fuzzy Selection Tool
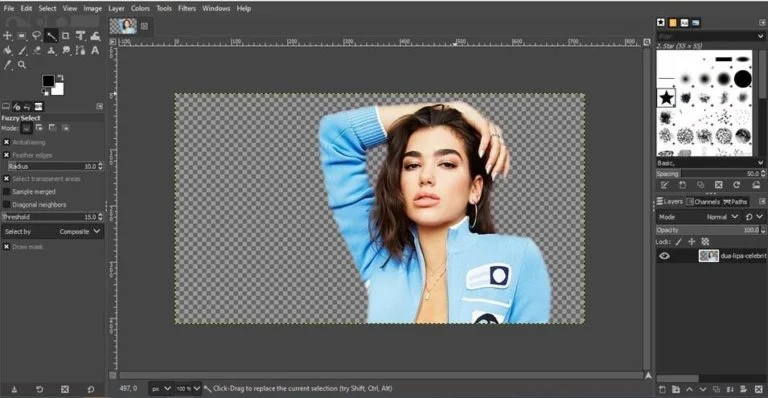
In GIMP, the Fuzzy Select Tool (also called the Magic Wand Tool) helps you select parts of an image that have similar colors. When you click on a color, it selects the area around it that looks the same. This tool works best for picking solid backgrounds or objects with clear edges.
Steps
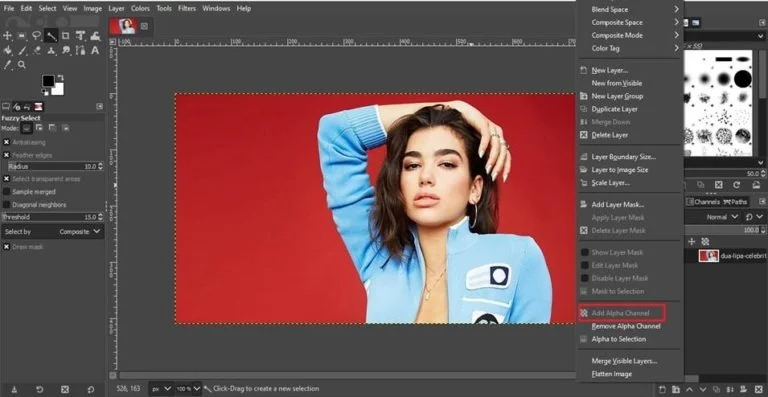
Open your image in GIMP. Then, right-click on the layer and choose ‘Add Alpha Channel’—this allows you to make parts of the image transparent.
Select the Fuzzy Select Tool from the toolbox (or press U).. After selecting the Fuzzy Select Tool, turn on Anti-Aliasing, Feather Edges, and Draw Mask. The Draw Mask will create a colored overlay to help you clearly see and select the area you want to remove.
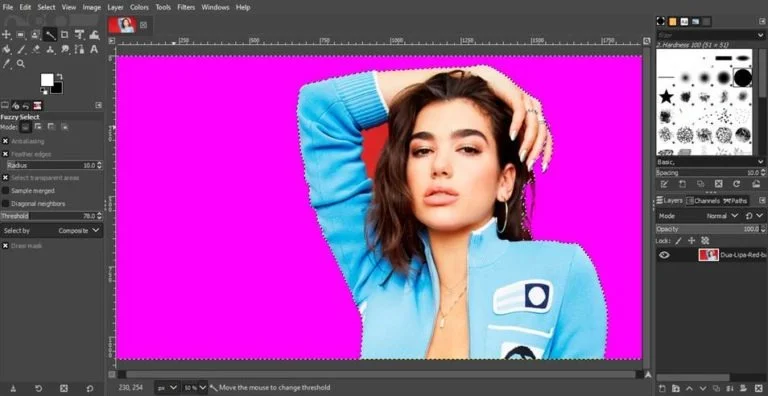
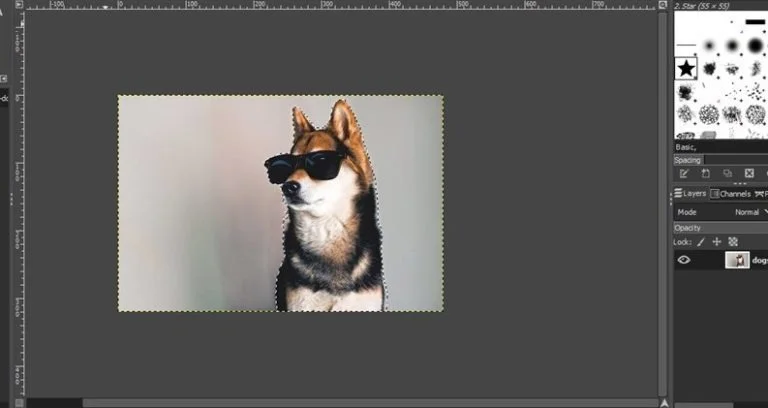
Click the background area you want to remove.
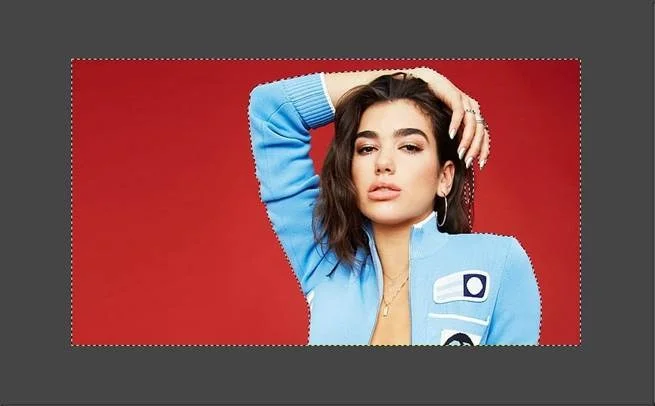
To adjust the selection, drag your mouse up to increase the selection area or down to decrease it. Once you’re happy with the selection, release the mouse and press Delete on your keyboard to remove the background and make it transparent.
Method 2: Using the Select by Color Tool
In GIMP, the Color tools help you work with colors in your image in different ways. You can use the Color Picker Tool to pick any color from your image. Tools like Levels, Curves, and Color Balance let you adjust and fix colors easily. You can also change colors using tools like Desaturate (which makes the image black and white) or Colorize (which adds a color tint).
To help remove a background in GIMP, you can use the Select by Color Tool. This tool lets you click on a color in your image, and it will select all parts of the image with similar colors. This is useful when your background has the same or similar colors—you can quickly select it and delete it to make the background transparent.
Steps
After you select the tool, turn on Anti-Aliasing and Draw Mask. If your photo needs softer edges, you can also turn on Feather Edges.
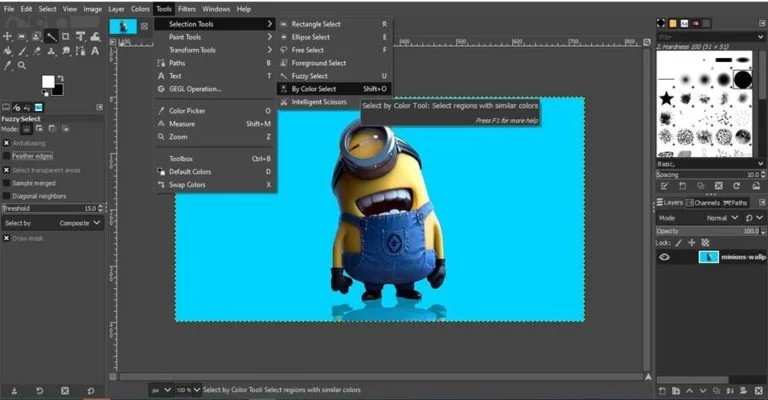
Now grab the select by color tool and adjust the perfect threshold by moving the mouse upward and downward.

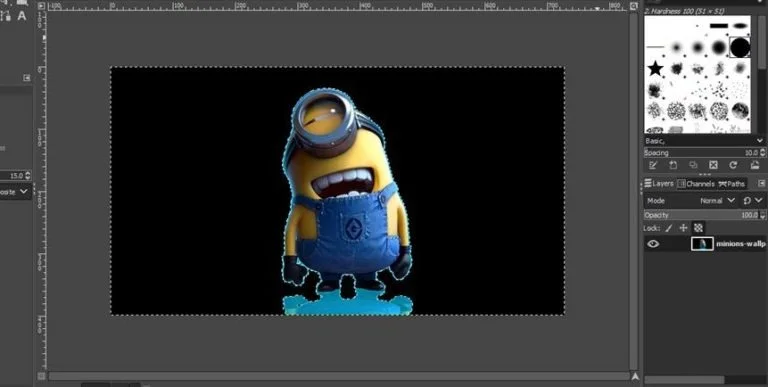
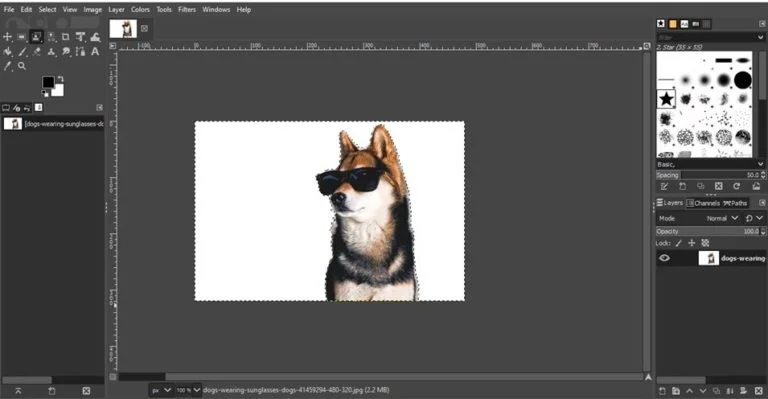
Once your selection is complete, release the mouse button and press the Delete key on your keyboard. This will remove the background and make it transparent. Once your background is removed in GIMP, you can import the image into layout software and apply clipping masks in InDesign for magazines, flyers, or brochures.
Method 3: Working with the Path Tool
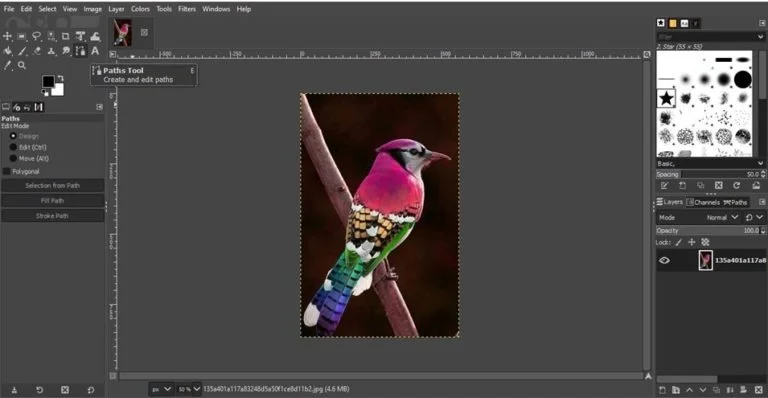
The Paths tool in GIMP lets you create smooth, curved selections using points connected by lines. It works like a more precise version of the lasso tool. You can adjust the curves by moving the points and handles.
To use it, select the Paths tool, then click to add points around the area you want to select. You can add as many points as needed to trace the shape. After finishing, connect the last point to the first to close the path. This tool requires some practice but gives very accurate selections—perfect for removing backgrounds carefully.
Steps
To remove the background using the Paths tool, first open your image and add an alpha channel for transparency. Then, select the Paths tool from the Tools menu to start creating your selection.
Click around your subject to create anchor points.
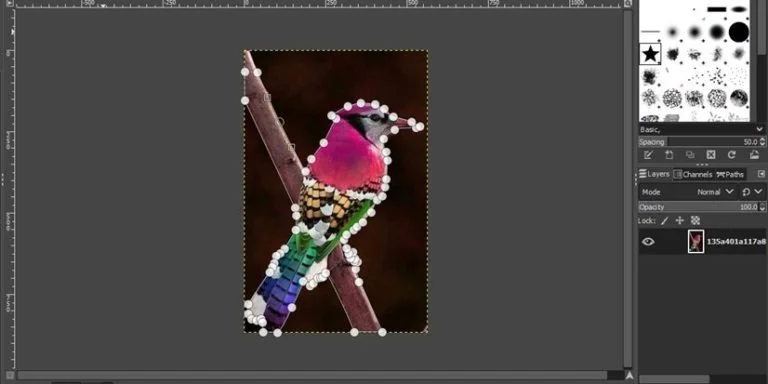
You can click and drag the lines between points to curve them in the direction you want. Be sure to click on your last point before adjusting the handles to keep drawing your shape smoothly.
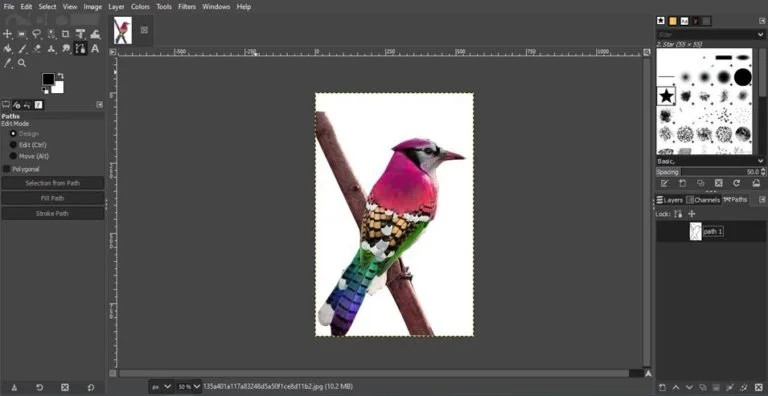
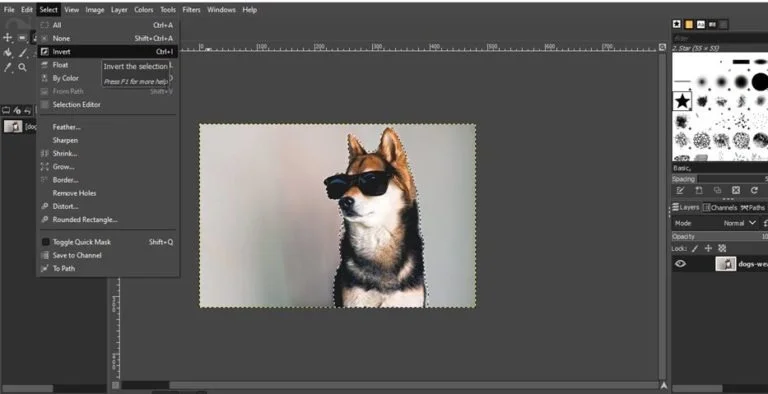
To close the path, hold Ctrl and click your starting point. Then, press Enter to turn the path into a selection. Next, go to Select > Invert to switch the selection to the background, and press Delete to remove it.
Method 4: Applying the Layer Mask Technique
GIMP’s layer masks let you edit parts of a layer without changing the whole image. They’re great for creating smooth, professional-looking pictures by hiding or showing different areas easily.
You can also use layer masks to control which parts of a layer are visible or transparent. This means you can adjust the opacity of different areas within the same layer separately. This method works best when there is a strong contrast between the subject and the background.
Steps
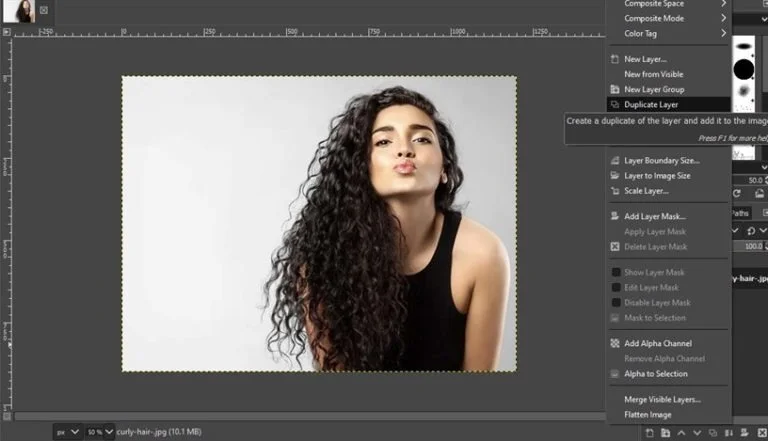
To start, right-click on your layer and choose Duplicate Layer to make a copy of your original image.
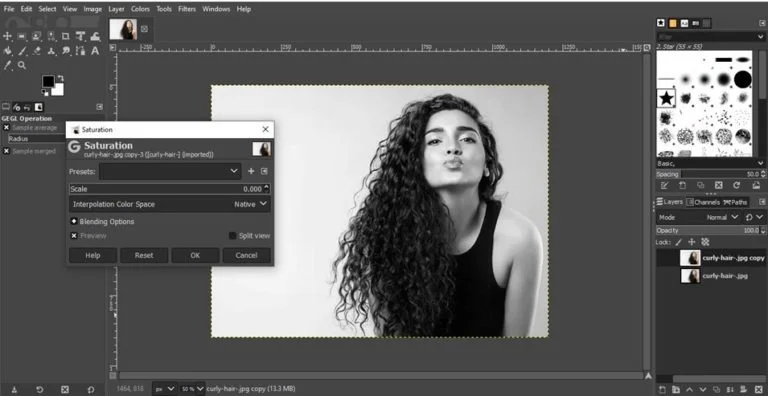
Next, go to Colors > Saturation and set the value to 0 to remove all color, then click OK.
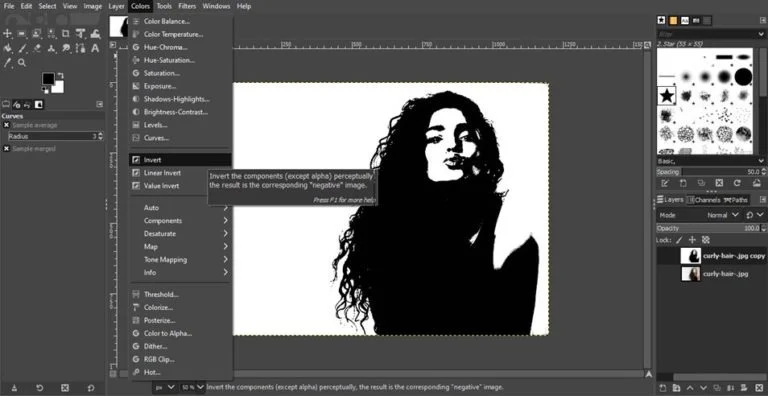
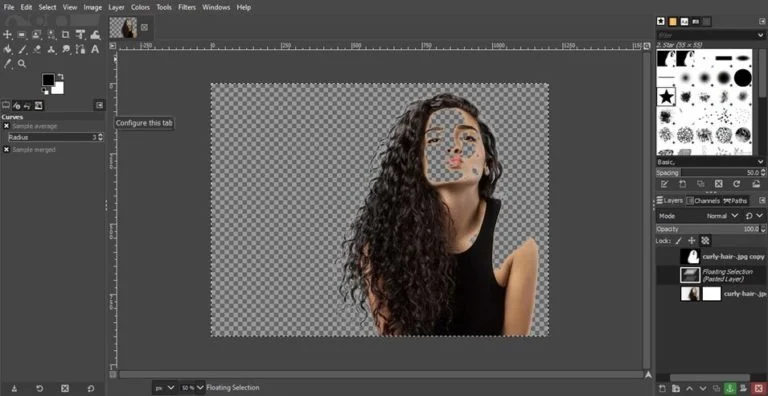
Then, go to Colors > Curves and adjust the top and bottom points so the subject becomes mostly black and the background mostly white. After that, go to Colors > Invert to reverse the colors.
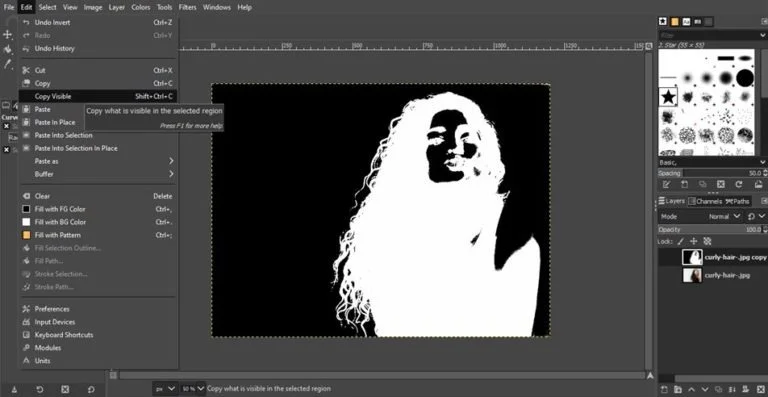
Next, go to Edit > Copy Visible to copy the entire visible image.
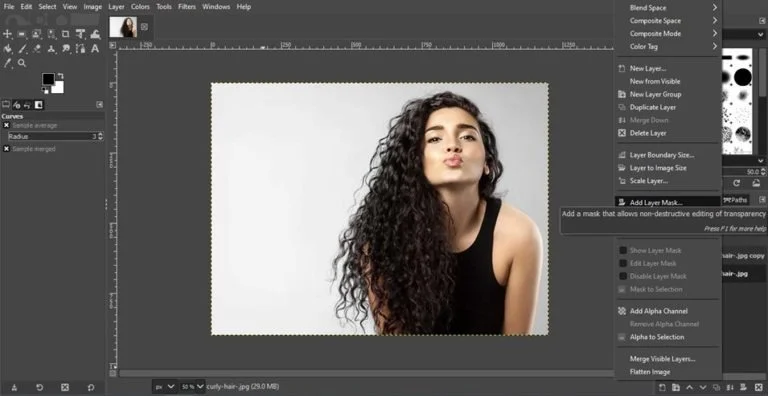
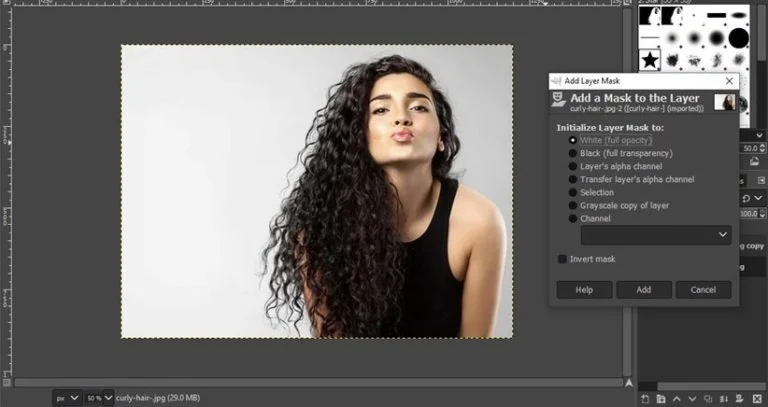
Click the small eye icon next to the duplicated layer to hide it. Then, right-click your original layer and select Add Layer Mask. Keep the default settings and click OK.
After that, go to Edit > Paste to paste the copied image onto the layer mask. Then, click the green anchor icon to apply it. The black areas will stay visible, while the white or transparent parts will become hidden.
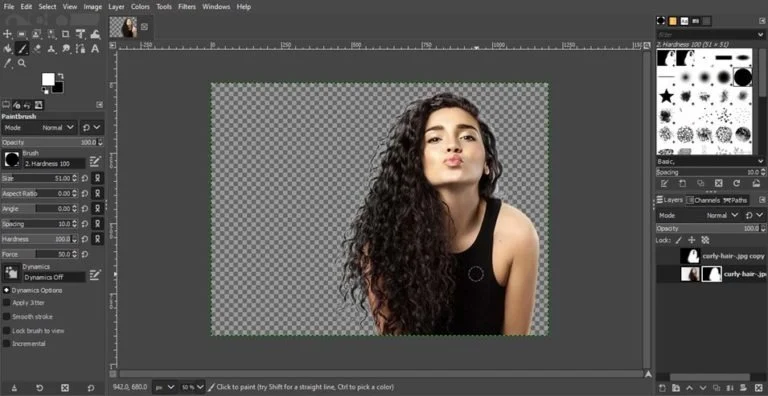
If some parts are missing or not perfect, use a white brush on the layer mask to reveal those areas again.
Method 5: Using the Foreground Select Tool
The Foreground Select Tool lets you extract the foreground from an image based on color differences. You can find it in the toolbox or under Tools > Foreground Select. For best results, use it where the foreground and background have a clear contrast. This tool works well for subjects with small details like hair strands.
Steps
Start by using the Foreground Select Tool to draw a rough outline around your subject. This doesn’t need to be perfect—just a basic shape to mark the area.

Hit Enter.
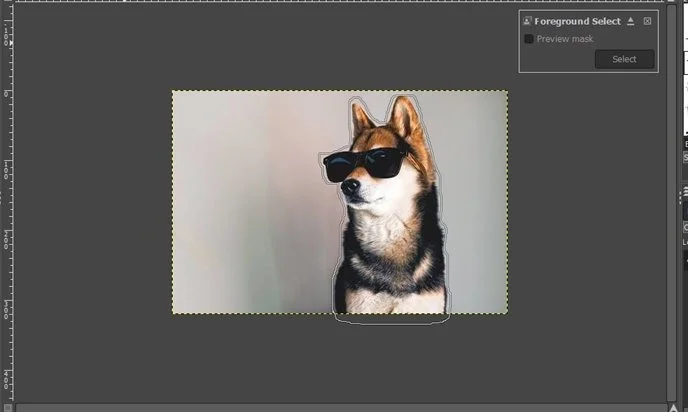
After drawing the outline, your background will turn dark blue and your subject light blue. Brush over your subject carefully, avoiding the edges.
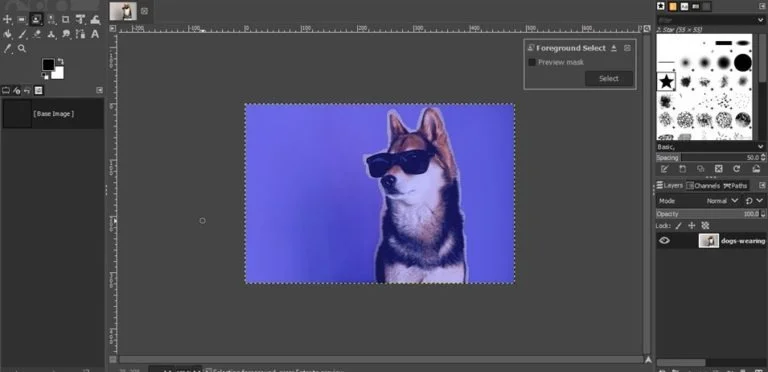
Use the [ and ] keys on your keyboard to make your brush smaller or larger. Don’t worry about being exact—just roughly brush over your subject. Next, switch on the Preview to check your selection. If it looks good, press Enter to turn your outline into a selection.
Once the selection is active, go to Select > Invert to select the background. Then press Delete to remove the background.
GIMP vs Photoshop for Background Removal
Both GIMP and Photoshop can remove backgrounds, but they differ in speed, ease of use, final precision, and the level of manual effort required to achieve professional-quality results.
| Feature | GIMP | Photoshop |
| Cost | Free & open-source | Paid software |
| Ease of Use | More manual, learning curve | Beginner-friendly with AI tools |
| Automatic Background Removal | Limited | Yes |
| Best For | Simple edits, hobby projects | Professional work |
| Hair & Fine Details | Requires manual work | Strong edge detection |
| Speed | Slower for complex images | Much faster with AI tools |
Which One Should You Choose?
Choose GIMP if you want a free tool and don’t mind spending more time manually selecting and refining edges. Choose Photoshop if you need fast, accurate background removal with advanced AI tools — especially for product images, portraits, or professional design work.
Frequently Asked Questions
Yes! GIMP’s built-in tools like Fuzzy Select, Paths Tool, and Layer Masks help remove backgrounds effectively for free.
For basic tasks like background removal, GIMP works well. For advanced, professional-grade edits, Photoshop has more features.
Absolutely! GIMP is 100% free and open-source.
Conclusion
GIMP is a powerful free tool to remove backgrounds, perfect for hobbyists and beginners. But if you’re working with bulk images, intricate details (like hair), or need flawless, professional results, manual editing with GIMP can become slow and tricky.
GIMP is one option for removing backgrounds, while a complete overview of background removal methods and tools is covered in our main guide.