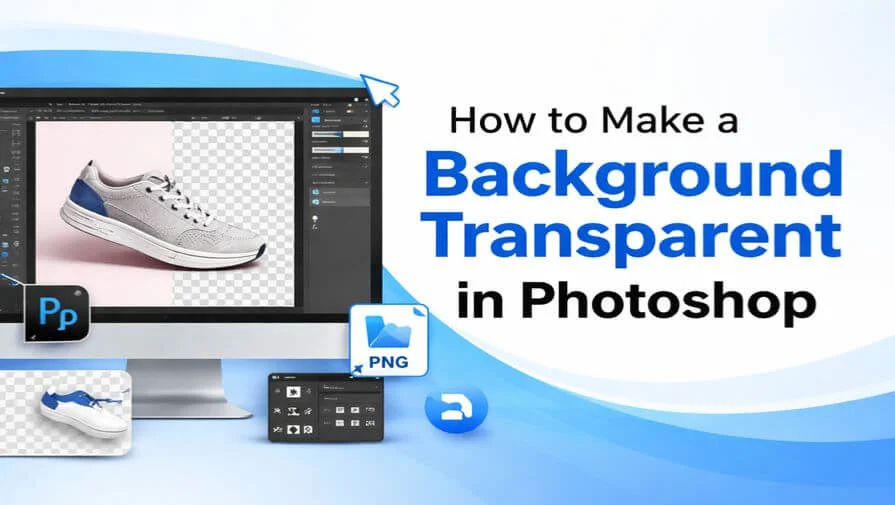
Removing a background is one of the most useful skills in Adobe Photoshop. Whether you’re creating product photos, social media graphics, logos, or marketing designs, learning how to make a background transparent in Photoshop lets you place your subject anywhere without an ugly white box around it.
In this beginner-friendly guide, you’ll learn how to make a background transparent in Photoshop using both quick automatic tools and precise manual techniques. For a broader understanding of background removal methods, tools, and use cases, see our complete background removal guide.
How to Make a Background Transparent in Photoshop (Quick Answer)
- Open your image in Photoshop
- Unlock the background layer
- Click Remove Background in the Properties panel
- Refine edges if needed
- Export the image as PNG to keep transparency
What Is a Transparent Background?
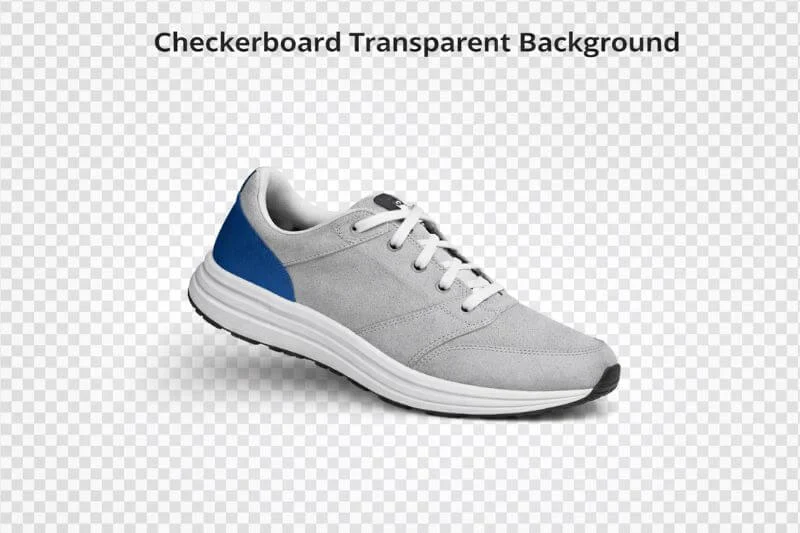
A transparent background means the area behind your subject has been removed, leaving invisible pixels instead of a solid color. In Adobe Photoshop, transparency appears as a gray and white checkerboard pattern.
Transparent images are widely used for:
- E-commerce product photos
- Logos and branding
- Advertisements and banners
- Website graphics
- Social media posts
This process is also called background removal, image cutout, or clipping path editing. This is especially important for branding assets — if you’re working with logos, here’s how to remove background from a logo while keeping edges sharp and clean.
If you want a deeper explanation of how transparency works and where it’s used, read our guide on image transparency background and why it matters.
Fastest Way to Remove Background (AI Method)
Photoshop includes AI-powered tools that make background removal in Photoshop extremely fast.
Step 1: Open Your Image
Open your photo in Photoshop.
Step 2: Unlock the Background Layer
In the Layers panel, click the lock icon to make the layer editable. This allows you to edit the image, since locked background layers can’t be modified.
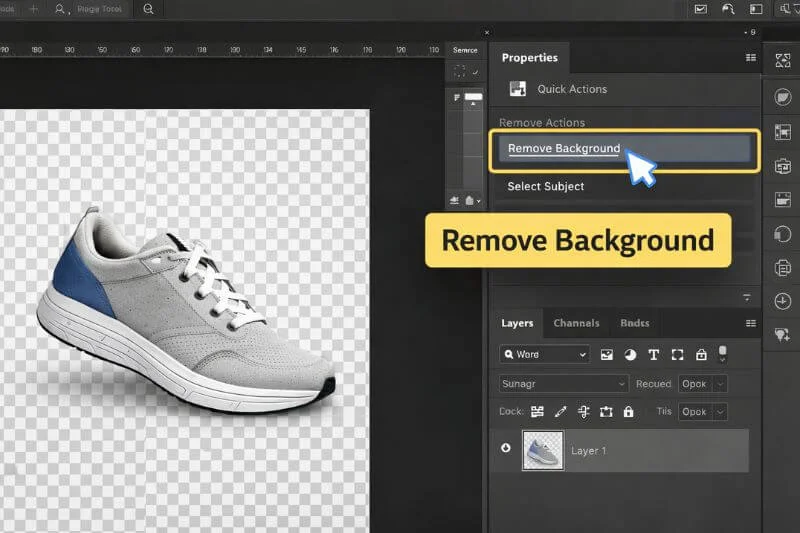
Step 3: Click “Remove Background”
Go to Window → Properties. Under Quick Actions, click Remove Background. Photoshop automatically detects the subject, removes the background, and adds a layer mask. This saves time by creating a quick automatic selection instead of doing it manually.
Manual Methods for More Accurate Background Removal
For complex products or detailed edges, using more controlled selection tools gives cleaner and more precise results than fully automatic background removal.
Method 1: Select Subject (AI-Assisted)
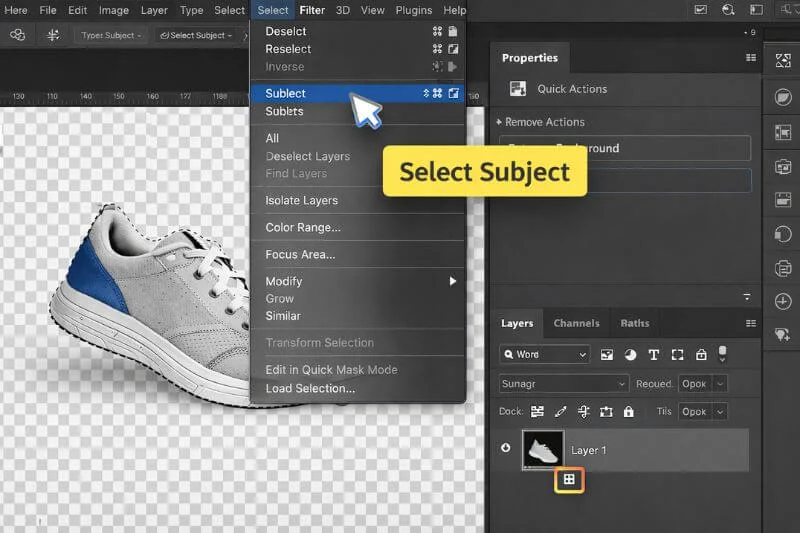
Go to Select → Subject. Photoshop uses AI to help detect and select the main object, but you still control the selection and refinement manually. Click the Add Layer Mask icon. This hides the background while keeping it editable, so you can refine the edges later using masking tools.
This method is great when you want a quick starting point but still need control over fine details. It’s more accurate than one-click background removal, especially for subjects with slightly complex edges.
Method 2: Pen Tool (Best for Product Photos)
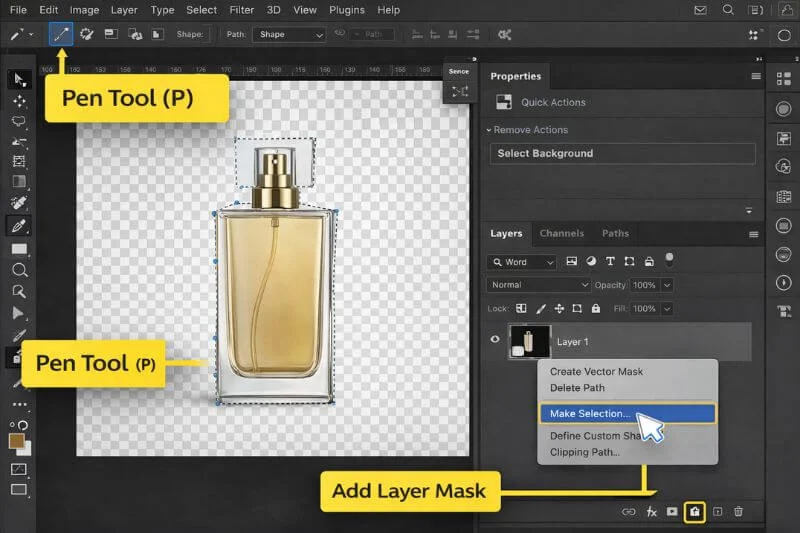
The Pen Tool is ideal for hard edges, such as bottles, electronics, packaging, and furniture.
Steps
- Select the Pen Tool (P). This tool lets you create a precise path around the object.
- Carefully draw a path around the subject. This creates smooth, controlled edges that look more professional.
- Right-click and choose Make Selection. This converts your path into an active selection area.
- Click Add Layer Mask. This hides the background without permanently deleting it, so you can fix mistakes later.
This technique creates high-precision image cutouts commonly used in e-commerce product photography. For a beginner-friendly walkthrough, see our guide on photo cutout techniques in Photoshop.
After removing the background, you can place the subject into creative layouts. If you’re working in print design, learn how to use clipping masks in InDesign to fit images perfectly into custom shapes.
When to Use Each Background Removal Tool
| Situation | Best Tool | Skill Level |
| Simple background | Remove Background | Beginner |
| People or portraits | Select Subject | Beginner–Intermediate |
| Hard product edges | Pen Tool | Advanced |
| Hair, fur, soft edges | Select & Mask | Intermediate |
How to Refine Edges (Hair, Fur, Soft Areas)
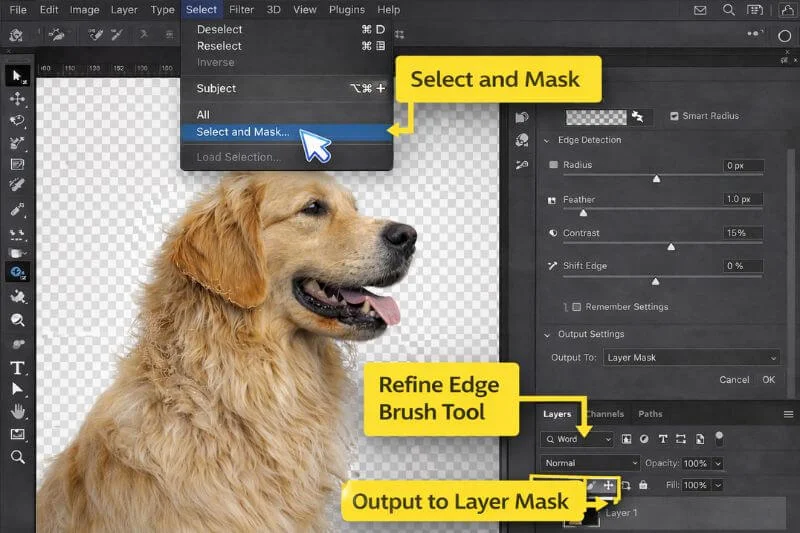
Fine details like hair or fur need extra refinement to avoid rough edges or white halos.
- Select the layer mask. This ensures you are refining the edges of the cutout, not the image itself.
- Click Select and Mask. This opens Photoshop’s advanced edge refinement workspace.
- Use the Refine Edge Brush Tool around hair or fur. This helps keep soft details like hair strands instead of cutting them off harshly.
- Adjust Smooth, Feather, and Contrast. These settings help blend edges naturally and reduce jagged outlines.
- Output as Layer Mask. This keeps your edits non-destructive so you can refine the mask again later.
This step ensures clean, natural-looking background cutouts that blend well on any new background. For complex subjects like hair, fur, or transparent objects, professional image masking services can deliver more natural results than automatic tools. If you’d like to understand the technique behind this process, explore image masking techniques in Photoshop.
Why Use a Layer Mask Instead of Deleting?
Layer masks are the safest way to remove a background because they are non-destructive. This means you can always bring back hidden areas without starting over.
- White on mask = Visible
- Black on mask = Hidden
You can paint with a soft brush to fix small mistakes without permanently deleting pixels.
Transparent Background vs White Background
A transparent background and a white background may look similar at first, but they serve different purposes in design and e-commerce.
| Transparent Background | White Background |
| No visible color behind the subject | Solid white color behind the subject |
| Shown as a checkerboard in Photoshop | Looks like a normal white backdrop |
| Flexible for placing on any design or color | Required by some online marketplaces |
| Ideal for logos, graphics, and overlays | Common for product listing images |
If a platform requires a white background, you can still start by creating a transparent cutout and then place it on a white layer later. This gives you more editing flexibility and cleaner edges.
How to Save an Image with a Transparent Background
JPG does NOT support transparency.
Use one of these formats instead:
- PNG – Best for websites and online use
- TIFF – High quality with transparency
- PSD – Editable Photoshop file
Export as PNG
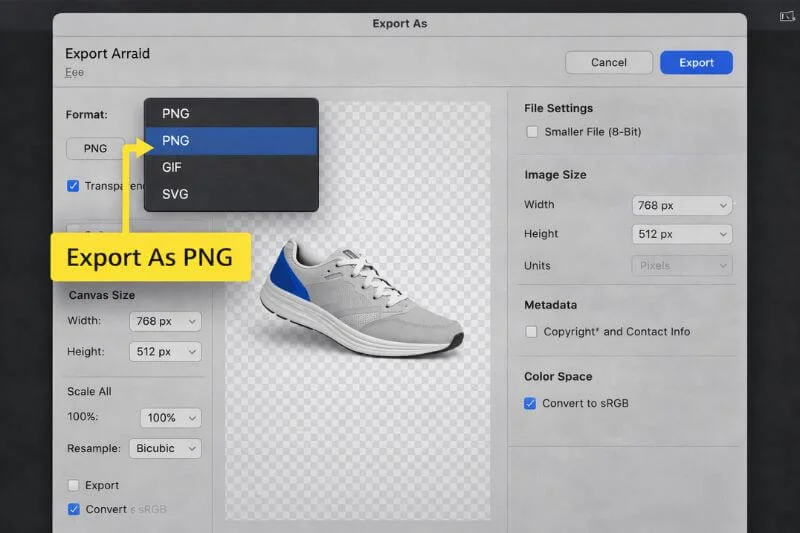
Go to File → Export → Export As → PNG → Export
This keeps your transparent background intact. PNG files support transparent pixels, while JPG files replace transparency with a solid white background.
Common Background Removal Mistakes
Avoid these beginner errors:
- Saving as JPG instead of PNG
- Not refining edges around hair or soft details
- Leaving white halos around the subject
- Deleting the background instead of using a mask
Avoiding these mistakes ensures your cutout looks clean and professional on any background.
FAQ – Photoshop Transparent Background
You likely saved the file as a JPG, which replaces transparency with white.
PNG, TIFF, and PSD formats support transparency.
Use the Remove Background button in the Properties panel for automatic AI selection.
They often use the Pen Tool for precise clipping paths and edge control.
Final Thoughts
Learning how to make a background transparent in Photoshop gives you full control over how your images appear in design, marketing, and e-commerce. Whether you use AI tools for speed or manual techniques for precision, mastering background removal helps you create clean, professional visuals that work on any background.
Clean cutouts make images look more polished and help products stand out in competitive marketplaces. If you need perfectly hand-drawn cutouts for product images, the experts at Clipping World provide high-quality background removal services with fast turnaround — and you can start with a free trial.