How To Make Hair Color Correction in Photoshop

The inner meaning of hair color correction is quite remarkable where coloring the hair could be costly and time-consuming.

So, we’ll see how to varnish and colorize someone’s hair in an image in this Photoshop tutorial with a modification advantage even after completing the task.

At the same time, we will learn a technique that offers us control over what we’re doing including several different ways to fine-tune the results.

This technique can be used on images of other people (friends, family, clients), or even on a photo of oneself to see how different hair colors would appear on you.

If you are interested in doing the job by yourself, that is good enough. But, if you are looking for efficient color correction by professionals, the option is available as well.

Description of Hair Color Correction Tutorial

We are using an image that is downloaded from the free options of freepik.com. There are a lot more options and variations that you can choose from there.

However, this is for learning purposes only, and if you need to do this on your images, no need to look for an image anywhere else. We are giving you the solution for hair color correction at home without using colors on your hair physically.

Here, in this article, we’ll colorize her hair that suit her better and make it editable so that we can modify that later. But you have complete choice over the color and intensity of the color you use with your image.

When we’re done, the visual impression will be quite fascinating and appealing you will be amazed.

We’ll see how simple it is to change the color back to something completely different at the end of the tutorial. Well, in physical form, color correction hairdressers can do tremendous toning to your hair in real.

Step-by-Step Hair Color Correction

Hair Color Correction in Photoshop is a tactical enhancement and logically there will be several steps to get the best form.

However, once you are done with the whole operation, you can apply the same for any photo by changing the mask show/hide option and making remarkable changes to them.

So, let’s jump into the matter and learn them step by step.

hair color correction step by step tutorial

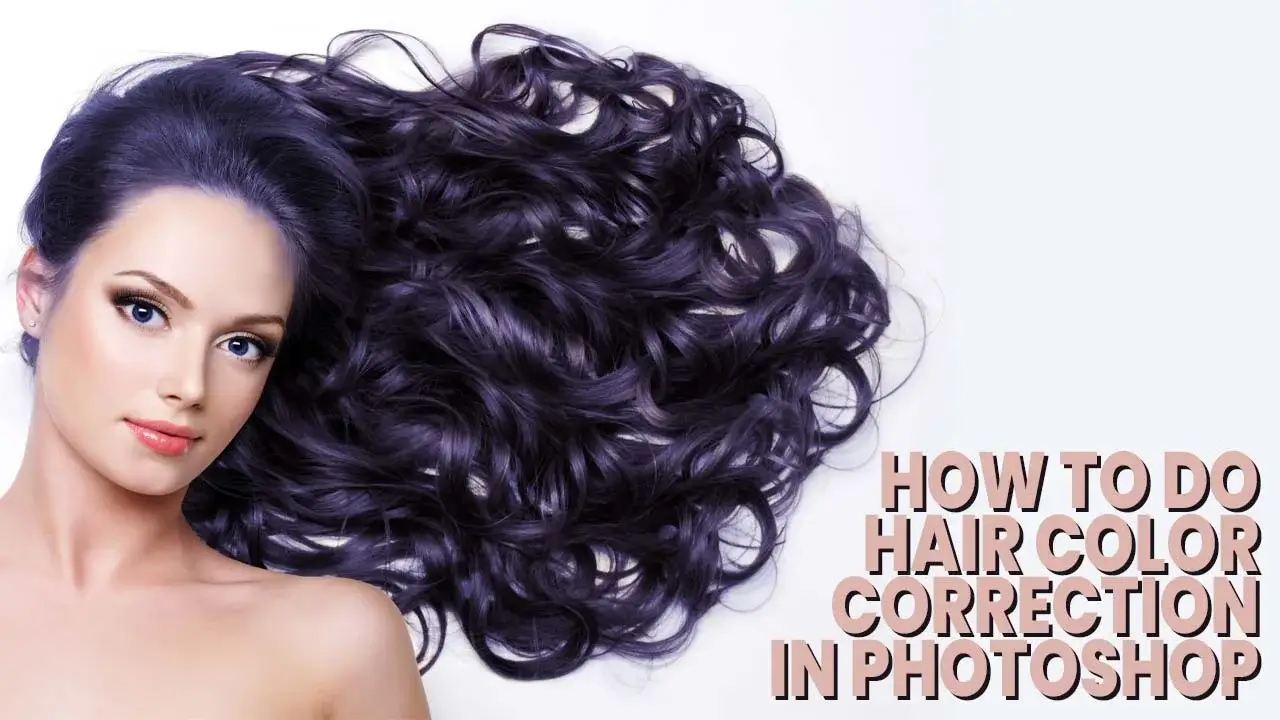
By the way, we are presenting hair color correction before and after here to give you an idea of the magical work we are about to proceed with.

Step 1: Hue / Saturation Adjustment Layer

Click on the New Adjustment Layer icon from the circle divided diagonally between black and white at the bottom of the Layers panel with our image open in Photoshop.

Click on the circle and you will have bunches of adjustment layers in a column.

To create a new adjustment layer, select the icon “New Adjustment Layer.” Then, from the adjustment layers list that displays, choose Hue/Saturation.

You can also do the same by clicking on the Photoshop menu Layer > New Adjustment Layer > Hue/Saturation. 

hue saturation adjustment layer

Of course, make sure there is no other layer in the layers panel except for the background layer. Well, if there are other layers, select the layer where you want to apply the hue/saturation tuning and add it above that. You can also hide other layers that are not a concern.

Step 2: Colorization in Hue / Saturation

Select the Colorize option in the lower right corner by clicking within its checkbox when the Hue/Saturation dialog box appears. Why colorize the adjustment layer when we are about to change the color with sliders? 

Because this selection will allow you to make color modifications according to your will. Otherwise, you may not get the perfect color or tone you want by moving the sliders only.

colorization in hue saturation

Your entire image will be colorized in a shade of red as soon as you pick the Colorize option. But nothing to worry about as this is just another layer that you can remove or adjust anytime you want.

Our further operation depends on this colorization where you can consider this as the core setup. The sliders are accessible anytime by double-clicking on the icon from the layers panel on the left side of the mask.

Step 3: Color Selection for the Hair

To choose the color for the person’s hair, drag the Hue slider left or right. You’ll be colorizing the entire image for the time being. But that will be fixed in the following few phases. For now, disregard the rest of the image and concentrate just on the hair.

When you’ve selected a color you like, drag the Saturation slider left or right to change the value. Sliding it to the right increases the saturation while dragging it to the left decreases it.

Don’t stress about getting the hue and saturation too precise as you can always adjust them afterward.

color selection for the hair

For now, I’m going to set the Hue to approximately 35 and the Saturation to around 85. Select a new hair color using the Hue slider, then use the Saturation slider to modify the tone of the color.

To exit the dialog box, click OK when you’re finished. The woman’s hair, like the rest of her, has turned orange-red color:

Step 4: Invert Hue/Saturation Adjustment Layer Mask

One of the fantastic things about adjustment layers in Photoshop is that each one comes with its own layer mask. You can also remove the mask if you need to and add another one, when necessary, by clicking on the mask icon below the Layers panel.

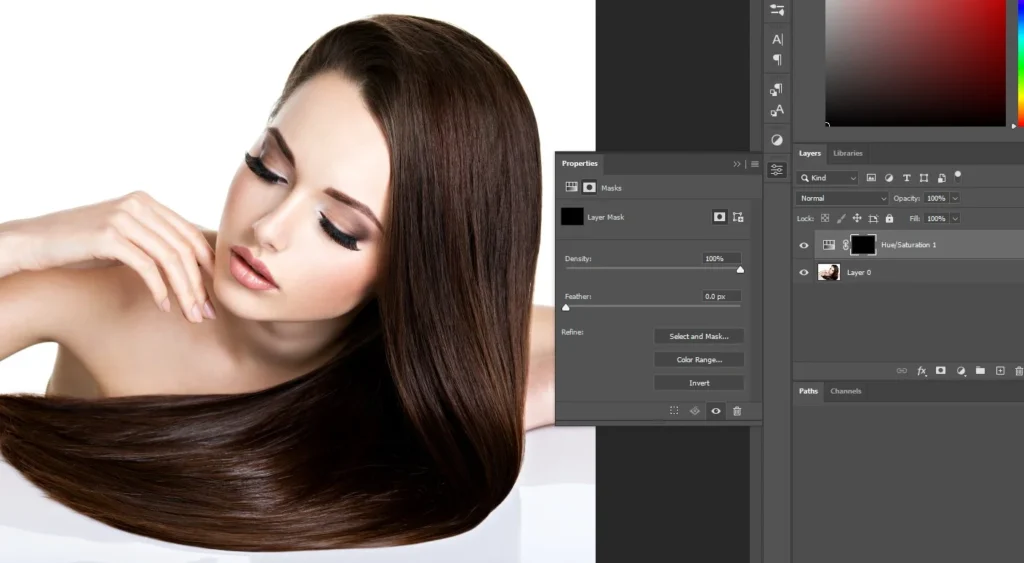
To begin, fill the Hue/Saturation adjustment layer’s layer mask with black to entirely obscure the effects of the adjustment layer. Because black is our current Background color, and the layer mask is already selected.

Photoshop selected the layer mask for us when we added the adjustment layer and set our Foreground and Background colors to white and black, respectively.

hair color correction layer mask

All we have to do now is fill the layer mask with black using the keyboard shortcut Ctrl / Command + I for Win / MAC. This will invert the mask, and no change in the original color will be seen.

The colorizing effect vanishes from our image as soon as we do this, and the thumbnail for the adjustment layer, which shows us what the layer mask will look like, is now filled with black in the Layers palette.

This means no modification of the Hue/Saturation adjustment layer will be visible unless you brush over the mask with a white color. One basic theory of masks is black hides and white shows where brushing with the colors will be the tool you need to use.

Step 5: Magic of The Brush Tool

All we need to do now is paint with white color on our layer mask over the hair to bring back the colorizing effect and have it applied solely to the hair.

The results of the Hue/Saturation adjustment layer will be visible anyplace we paint with white on the layer mask, while the effects will be hidden anywhere, we paint with black.

To begin, choose the Brush Tool from the Tools palette or use the keyboard shortcut. So, hit the letter B on your keyboard to choose it.

Photoshop Brush Tool

To reveal the colorizing effect on the hair, we need to paint with white on the layer mask, and Photoshop has already set our Foreground color to white for us, as shown in the Foreground and Background color swatches near the bottom of the Tools panel.

The swatch on the left is the Foreground color, and the swatch on the right is the Background color. By the way, if you find the colors are not black and white, press ‘D’ to choose the default selection.

You can also switch between black and white by using the keyboard key ‘X’. So if you press once, it will be changed from white to black, and pressing again will shift the colors.

Our Foreground color is white, and our Background color is black, as seen in Photoshop’s Tools palette. We also know we have our layer mask chosen because the layer mask thumbnail in the Layers palette has a white highlight border around it, as shown in the image for Step 4 above.

Step 6: Mask Operation to Show or Hide Areas

All we have to do now is paint over the hair with the Brush Tool, the Hue/Saturation adjustment layer’s layer mask selected, and white as our Foreground color.

Use your keyboard’s left and right bracket buttons to swiftly modify the brush size while painting. The brush is made smaller by the left bracket key and larger by the right bracket key.

Also, hold down the Shift key while pressing the left bracket key a few times to soften the edges of the brush for both Win and MAC. To restore the colorizing effect, simply paint over the hair. Lower the Opacity of the brush to roughly 25% or so for difficult places with only loose strands of hair.

hair color correction mask operation to show or hide areas

Reduce the size of your brush to a little more than the size of the region you’re colorizing, then paint over it several times. As a result, the color in certain regions will be less strong. You might find it useful to zoom in on certain areas as well.

The quickest way to do so is to scroll up the roller of the mouse around the area while holding down the Alt / Option for Win / MAC OS. The region you picked will then be zoomed into by Photoshop.

After completing the task, use Ctrl / Command + 0 for Win / MAC to fit the image according to the screen. If you make a mistake and accidentally paint over anything you didn’t plan to.

Simply press X to swap your Foreground and Background colors, making black your Foreground color, then paint over the mistake to undo it.

Then press X to reset your Foreground color to white and keep painting until you’ve colored all of the hair: we’ll go over how to fine-tune the effect next!

Step 7: Photoshop Blend Mode in Hair Color Correction

The editing part of the masking is comparatively difficult if finally completed. Adobe Photoshop deserves a great complement for serving the Hue/Saturation adjustment layer’s layer mask, we were able to colorize the hair while leaving the rest of the image unharmed. 

The blend mode is set to “Normal” by default, which works OK, but let’s alter it to something more appropriate. Select Color or Soft Light from the list of blend mode options in the Layers panel’s top left corner, by clicking on the down-pointing arrow to the right of the word “Normal.”

photoshop blend mode in hair color correction

It just modifies the color of a picture, the “Color” blend mode provides us a stronger colorizing impact (when we had the blend mode set to “Normal”, it was affecting not only the color but also the lightness values of the hair). With the adjustment layer’s blend mode set to “Color”.

We have complete content on Photoshop blend modes by the name, “A Brief On All The Blend Modes In Photoshop”. You can get a clear concept with the blend modes and apply it technically.

Select the blend option that complements your image the best. Also, hair color correction from dark to light or light to dark can be adjusted here by using different Blend modes available here.

Step 8: Opacity Adjustment

The adjustment layer’s opacity can also be reduced to fine-tune the colorizing effect. Try using different values until you’re satisfied with the results.

I’ve set the adjustment layer’s opacity to 75% in this image. However, different image hair colors along with the depth of the overall photograph may require different values.

Opacity Adjustment

I found the combination more realistic and appealing. Well, if I reduce the opacity more the highlight may be deemed but could be satisfying by different people. So, for the project, I am standing with the value that satisfies me.

Step 9: Hue / Saturation Slider for Different Colors

We have done here with the last step. But, if you want to modify the hair color, double-click on the Hue/Saturation adjustment layer’s thumbnail in the Layers palette.

This reopens the Hue/Saturation dialog box, and we can now modify the hair color by sliding the Hue slider.

With the Saturation color, you can also modify the color’s saturation. We may make as many adjustments as we like. Because this is an adjustment layer, so we don’t have to worry about harming our image. 

To give her hair a more bluish-black tint, I’ll set my Hue slider to 211 just for a demonstration. Actually, I personally like the shade of the color and often use it while enhancing my dear ones.

hue saturation slider for different colors

In addition, I am also changing the adjustment layer’s blend mode to “Linear Dodge (Add)”. And also reduced the opacity to roughly 60%.

Here’s what I came up with. You can also visit our blog in detail “Hue and Saturation Technique in Photoshop” to learn the thing more intimately. 

That’s all there is to it. And that’s how simple it is to change the color of someone’s hair with Photoshop. More Photoshop image editing techniques you may go through if you visit our other blogs and tutorials. That would be amazing, and you can do more with the tips for sure.

Conclusion | Photoshop Hair Color Correction

On TikTok, Instagram, and Snapchat, users may use filters to see how they’d look with different hair colors. Unfortunately, there is no hair color correction chart for you to choose from.

However, the quality of these app filters is usually low. You may have even wondered if there was a way to enhance the effect.  It looks best on hair with a distinct edge, as demonstrated in the example below. Also, today girls like gorgeous hair color volume better than a naturally usual impression.

FAQ | Hair Color Correction

How Long Does Color Correction Take?

Color Correction is a kind of Photo Editing Service that completely depends on the exact photo or image. Sometimes it could take only a minute and sometimes an hour. Well, there is an automatic color correction process that requires a single click only.

Does Color Correction Damage Hair?

Some color tone modifications are much simpler than most others. whereas some can be done in a single session. While others can take weeks! A pigment repair is usually somewhat more costly, requires a long time, and may cause hair imperfections.

Scroll to Top