A common query online is how to convert negatives to digital images using Photoshop. And that’s why today we are going to write about it.
Well, this is your chance to convert negatives to digital format at home. If you cannot do that, there are companies providing graphics solutions.
Nothing to worry about, we are here to give you the best idea to convert the negatives in no time. The tutorial may be a little longer than the heading.
But trust me, this won’t take more than a minute or two per image if you understand it well. Let’s start by capturing the negatives.
The Capturing Process | Convert Negatives to Digital Images
Converting process begins with the capturing of the negatives and it’s pretty simple. Put the negative in front of the plain bright light and take a snap with your camera. Specialists say that macro lenses are good for capturing such negatives.
Printers that scan negatives and slides are good for the process as well. You need to maintain three important things to capture a negative image better for further processing. They are.
01. The Quality of the Film
You need the film quality better or at least ‘satisfactory’. Why is that? Because, if you capture a negative with low quality or damage, you may have to work more. Also, you may not get satisfactory results.
However, there are some situations that we may face when the quality is less important than memory. For that, you need to convert negatives to digital service by demand.
02. The Lens to Capture the Image of the Negative
You need to use a high-quality camera for sure. The lens is another prime requirement for capturing the negatives. Better to use a macro lens because it can capture small subjects from a short distance.
If you want your negative to capture in high resolution with more details this is the lens you must use.
However, if you do not have the kind of lens, you can use other cameras as well. Make sure the captured image is clear and large.
03. Lighting
In order to capture a subject properly, it is very important to take care of the lighting. Different kinds of subjects ask for different types of lighting for the theme.
The negatives we are handling require lighting from the back part of it. Any other lighting is not important.
No lighting except the one from the back brings a better result. You can use the ‘Light Board’ or ‘Light Box’ for the purpose. Best if the room is dark without any other light.
You can use the negative scanner to skip this process but I do not suggest that for quality output. A negative scanner is also costly and less available today.
The Editing Process | Convert Negatives to Digital Images
The process is pretty simple. Just follow the process and you are good to go. First, you need to place the negative on the Light Board or Light-box keeping a little distance from the surface.
You can use a negative holder plate that you can purchase online. The plate is the best option to keep the negative plain and perfect. Highlights are better without any distractions from the light.
Take a snap with the camera you have and transfer it to Photoshop. As I already mentioned, Macro lenses are better for the job as they can capture high-resolution images. And rich with more details so that you can work well.
The editing also gives the alternative to the pain of, “Who can develop old negatives?” Now you are halfway through. Let’s go for the rest and they are.
A. Cropping

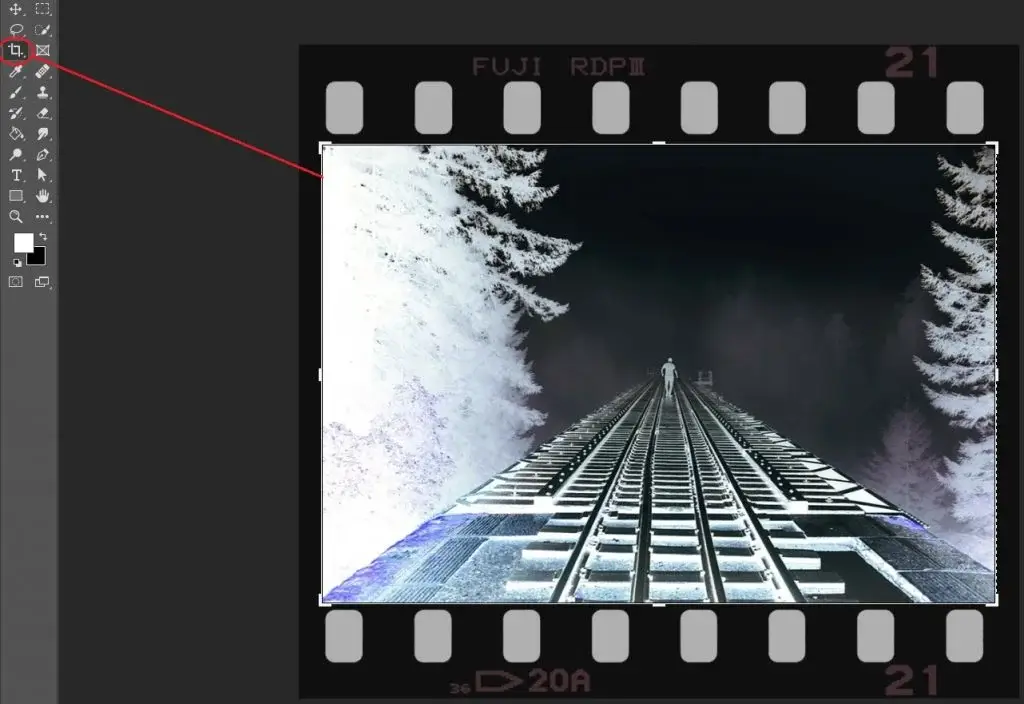
As we are working with the negatives it is not mandatory to edit the edges of the image or negative border. So, we will crop the image only the section we need.
The ‘Crop Tool’ is in the lools column on the left side of Photoshop. If you cannot see the ‘Tools’ panel, go to the tab ‘Window’ and click on Tools.
B. Editing
To go through the editing process first, you need to turn the negative into a positive. Go to the button ‘Create new fill or adjustment layer’ and select invert.

The ‘Invert’ layer converts negative into positive. You can have a nearly real view of the negative now. Fortunately, we have used the cleanest negative with fewer impurities.

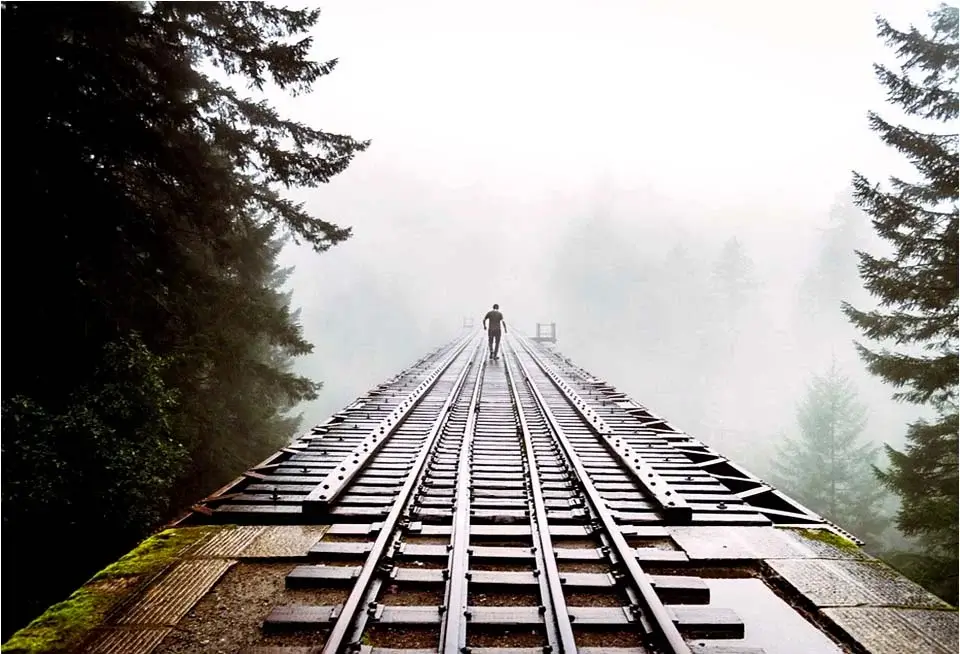
The image is already looking much better. Brings out the natural look of the real scenario. But still, you may see some of the impurities that should not be. Here we will try to fix the tone. The selected scenario represents foggy woods and rail lines with a human being.
We will use the ‘Curves Adjustment Layer’ and use an automatic color correction process. If you want to learn more about the process, follow the blog “Photoshop Automatic Color Correction in CS6”.

The image looks much better already. You can adjust the curve level from the graph, or you can move the sliders a bit according to your will. However, you may not need to do so if the result is already satisfactory.
I am changing the variables a little bit though. Also, you can move the lines on the graph if you want.

Adjusting the variables brings better sharpness to details. As the image contains fog, we do not need to make it crystal clear. Making the image crystal clear may ruin the natural exposure.
You may also use the ‘Color Balance Adjustment Layer’ that allows you for further editing. I am just showing the option a little bit but may not be important for this image.

I have changed the levels a little, increasing the Yellow which is the opposite of Blue. Also, I have increased the Cyan a little which is the opposite of Red.

I believe the image looks good enough now. Any more changes are not necessary according to my opinion. So I am stopping at the position. The final image is as below.

C. Save
You can save the image according to your needs. The most convenient one is saving in ‘PSD’. Why is that? Because it gives you the liberty to edit or modify the image anytime you want.
However, there are other formats that you can save the image with. They are JPG, PNG, Tiff, BMP, etc. but they do not maintain all the editing history in them.
On the other hand, these formats take less space than the ‘PSD’ and you can use them on the web.
FAQs | Convert Negatives to Digital Images
What is Negative to Positive Literally?
Ans: Negative to Positive is a conversion by which we get a printed image from a negative. Cameras of previous technology used films to capture the moments. Then the films needed to be processed for further use.
How Effective is the Conversion?
Ans: The conversion is very effective if you can manage every step properly. Some negatives are old enough and defective. But the memories are priceless. With the conversion, you can bring back priceless memories.
What is the Necessity of Negative to Positive Conversion in Photoshop?
Ans: The conversion in Photoshop is important if you think it is. You can easily print the photographs from some lab in exchange for a little money. But if you want the photographs perfect as you want, it is really necessary. You are the designer of your precious memories. You know better how to focus on them.
Is the labor Worth Conversion from Negative to Positive?
Ans: If you believe that good output is better than the negative can provide, it is worth every bit. However, you can work on printed images if you want. That will do the same except for the invert option.


