
Content-aware fill in Photoshop has made photographers’ lives easier. The photo editors are pulling off the amazing performance with this fantastic Photoshop tool. But how can you use content-aware fill in Photoshop professionally?
The professionals use content-aware tools to eliminate unwanted objects in the image. You can get a tidy photo with less effort than any other image editing method in Photoshop. So, you can use this tool to remove unwanted objects, fill in missing areas, and fix imperfections.
Here, you will learn everything about the Photoshop content-aware fill method. You will get step-by-step guidance to use this tool for your photos. You will get different ways to use content-aware tools to remove unnecessary objects from the photos, just like magic!
What Is Content Aware Fill in Photoshop?
Content-aware fill Photoshop saves time and effort for image editors. The tool allows you to remove any object or fill a missing part by simply selecting it. Photoshop’s powerful AI creates a natural and consistent look while you remove an object or fill a part in the image. It analyzes the patterns, color, and textures of the surrounding pixels of the images.
Thus, it replaces the missing area with precisions. This robust algorithm helps retouch photos, remove distractions, and fix imperfections. So, “how to remove an object from a photo in Photoshop” is now more effortless than ever.
Application of Content-Aware Fill
You can use the Photoshop content-aware tool for different purposes. It is a versatile tool that allows you to remove every inconsistency from the photo. The tool makes advanced photo editing easier than ever. You can create amazing photos by applying this technique. Here are some sectors where professionals apply the Content-Aware tool:
- Removing unwanted objects
- Removing blemishes, and stains
- Extending the backgrounds
- Filling in gaps
- Replacing weird sky or water
- Fixing the damaged areas
Does AI Fill Images in Photoshop Look Natural?
Photoshop AI has a powerful algorithm. You can generate high-quality, natural-looking images using the content-aware AI fill tool. The powerful AI model incorporates a vast dataset to replicate the surrounding pixels’ pattern, texture, and structure.
So you can generate high-quality photos using the content-aware tool in Photoshop. However, the effectiveness of AI fill Image depends on the quality of the original image and the user’s skill. Here are a few tips to get natural-looking images using this tool:
- A better-quality original image allows the AI to work with more data. As a result, you will get more realistic results.
- Now, be careful while making a selection. Precisely select the object or area you want to remove or fill.
- Experimenting with different variations for your images will help you find the best match. ‘
- Refining the image is always a crucial step in image editing. You should use blending and adjustment tools to fine-tune the generated content. It will allow you to ensure a seamless transition with the existing image.
So, you must consider these factors while generating an AI-filled picture in Photoshop. Let’s dive into the advanced uses of content-aware fill-in Photoshop.
Things to Know About Content-Aware Fill in Photoshop
Adobe Photoshop introduced the Content-Aware Fill in Photoshop CS5 (released in 2010). It had been a staple feature in all later versions of Photoshop. Over the years, Photoshop developers have made this tool more powerful, versatile, and user-friendly. Here are some of the notable changes to content content-aware tool in recent updates:
- AI-Powered Improvements
- Adaptive Sampling Areas
- Refine Edge Brush
- Interactive Previews
Locating Content Aware Tool in Photoshop
The location of this tool has changed slightly over the years. You may access it through the Edit menu or a dedicated workspace. Here is how to find content aware in Photoshop:
- Make a selection around the area you want to fill.
- Go to Edit > Fill.
- In the Fill dialog box, select Content-Aware from the Contents drop-down menu.
- Click OK to apply the Content-Aware Fill.
Photoshop CC 2019 and Later
- Make a selection around the area you want to fill.
- Go to Edit > Fill
- The Content-Aware Fill workspace will open. It allows you to preview and refine the fill.
- You can also access Content-Aware Fill by right-clicking on the selection and choosing Content-Aware Fill from the context menu.
- Another way to access the Photoshop Smart Fill is through the patch tool. The icon of the patch tool is rectangular, with the lines bisecting each other. Ensure Content-Aware is selected from the top bar of the patch tool options.
What Is The Content Awareness Scale in Photoshop?
Content awareness scaling aims to resize the background without impacting the subject. The traditional Photoshop scaling compromises with the pixels, but the content awareness scaling smartly analyzes the image. Thus, it allows exiting the background non-destructively.
Moreover, the aware scale allows for a change in the aspect ratio. So, you can convert a vertical image to a horizontal one while the subject remains unaffected. Using this tool, you can effectively adjust the composition and perform creative image manipulation.
However, if you want to choose between content-aware fill and content-aware scale, it depends on the task. You can use the content-aware scale to resize the background, but you need to use the fill tool to remove the unwanted elements from the photo.

How to Remove An Object from A Picture Using Content-Aware Fill?
The content aware fill Photoshop allows you to remove an object or person from the image conveniently. Removing unwanted objects from the photos is just a matter of a few clicks. You can do it using the Object Selection and Patch tools. I am going to describe both of them in the easiest way.
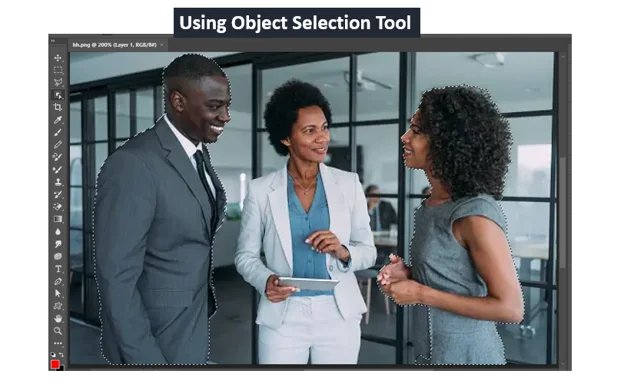
A. Using the Object Selection Tool
Using the object selection tool, incorporating the content-aware fill is the easiest way for object removal. You need less effort using this tool than other Photoshop techniques. Here is a step-by-step guide to removing a person from an image:
Step 1: Selection
Select the person using the Object Selection tool. Hold the Shift key and click on the other person or object to select them at the same time.
Step 2: Choose Content-aware Fill
Go to Edit>Fill>Content Aware Fill. Set output to Duplicate Layer from the Content-Aware Fill dialog box.

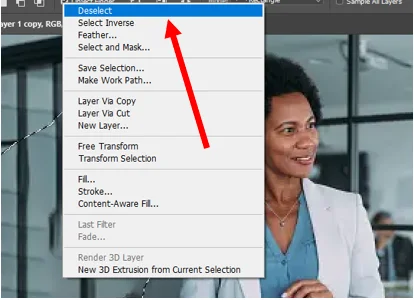
Step 3: Deselect, Spot Healing Brushing, and Save
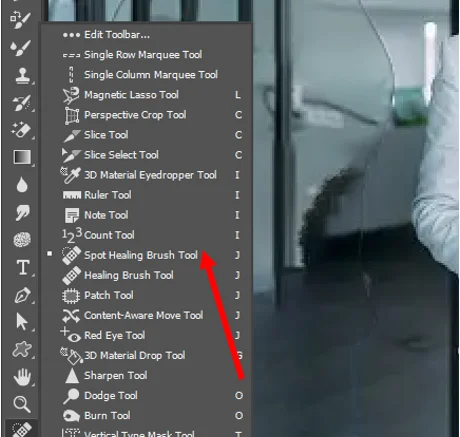
Right-click the mouse and select Deselect. Click the spot healing brush tool and carefully remove the edges of the person or the object. Finally, save the image.

B. Using the Patch Tool
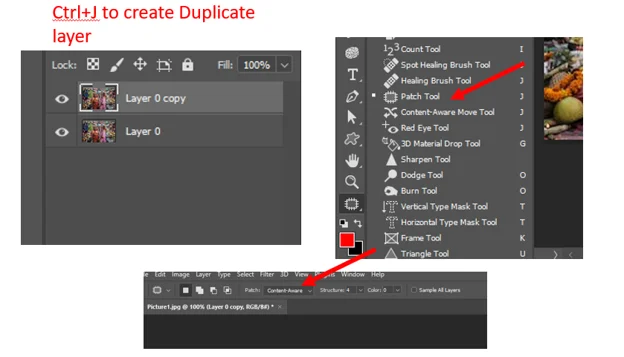
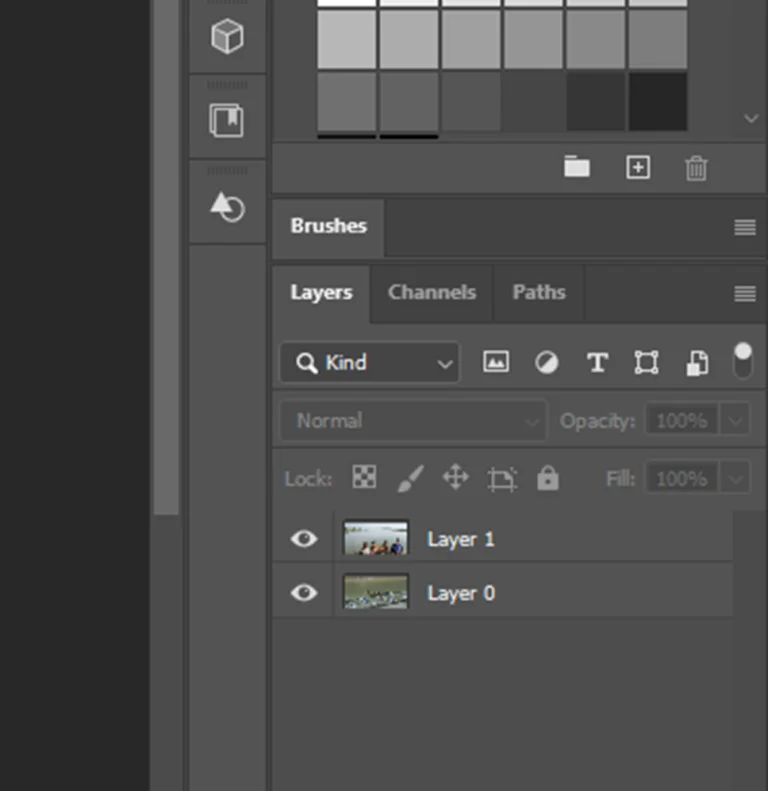
Step 1: Duplicate the Layer
Create a duplicate layer of the original picture. Select the patch tool from the toolbar. And make sure the content ware is selected from the top bar drop-down menu.
Step 2: Use the Lasso Tool & Drag
Draw a lasso around the object you want to remove. Grab and drag the selected area to the sampling area.

Step 3: Color and Structure Combination
Play with the color and structure combination in the option bar to get the right result for your photo. The patch tool works best for the low-detail areas. Yet, you can use this tool to remove objects from pictures with the help of content-aware fill.

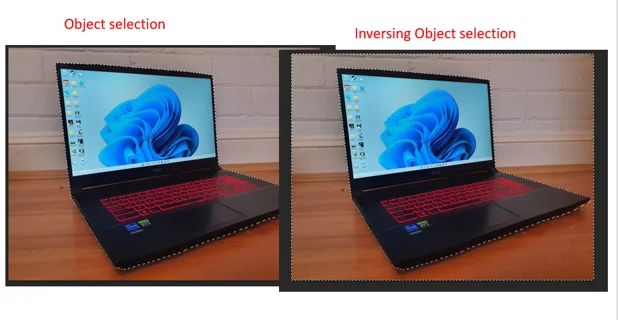
How To Change the Background Color
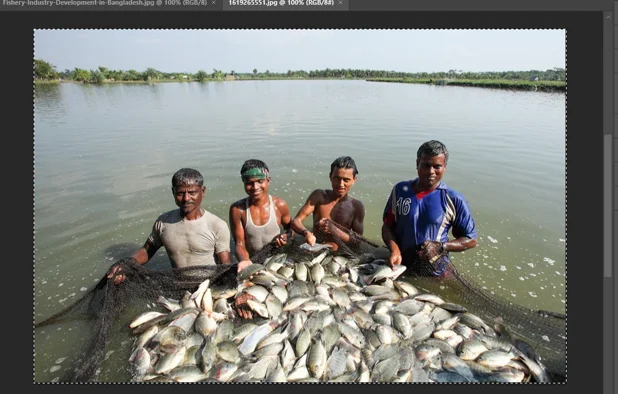
To change the background color using the content-aware fill, we will use the following image:

Step 1: Select the Background
Select the object using the object selection tool. After that, invert the selection by the right click of the image and making an Inverse selection. Thus, you can select the background easily.
Step 2: Adjust Settings and Preview
Go to Edit > Content-Aware Fill to access the content-aware fill. Adjust settings and preview.
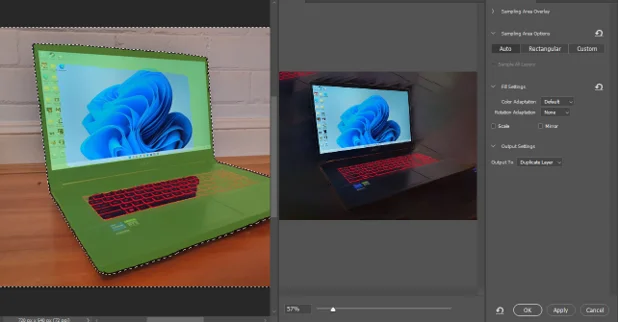
Step 3: Apply Content-aware Fill
Apply Content-Aware Fill by clicking the Apply button. The background is looking pretty now. What do you think? Let’s change the background color.

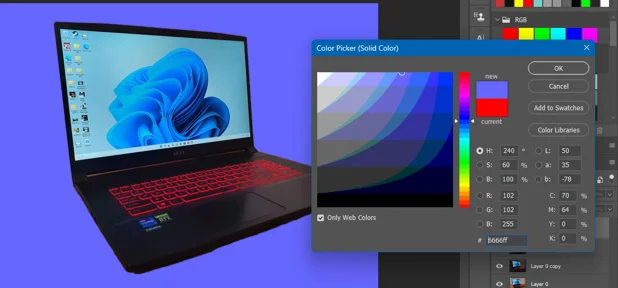
Step 4: Final Task
Create a new layer above the original image layer. Fill this new layer with your desired background color. Refine the edges using the spot healing or refine edge tool. Finally, save your image.
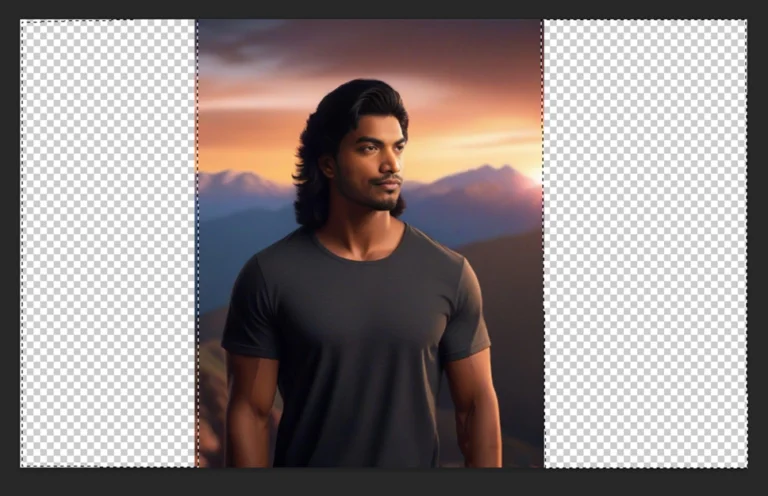
Expand Background of Image Using Content-Aware Fill
The photo editors expand photo backgrounds professionally using the content-aware fill tool. It’s easy and gives a natural-looking background. Here is the step-by-step guideline:
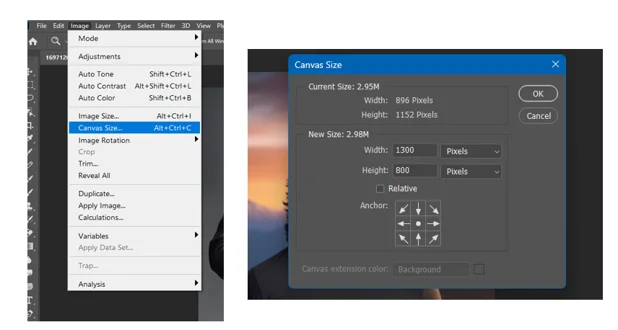
Step 1: Open and Create the Desired Area
Open your image in Photoshop. Determine the area you want to extend. Go to Image>Canvas to add a canvas. Adjust the width and/or height to create the desired space for the expanded background.
Step 2: Selection Tool
Using the selection tool, select the expanded area.
Step 3: Apply Content-aware Fill
Go to Edit > Content-Aware Fill to access the content-aware fill. Then, adjust settings and preview. Apply the content-aware fill, then hit OK if satisfied with the result.

Fill Text With An Image
Now, we will fill the text with images using Content-Aware Fill in Photoshop. These are the steps you need to follow:
Step 1: Create a Selection
Open the image you want to use. Create a duplicate layer of the original image. Create a selection of the text using any of the Photoshop selection tools. I prefer lasso and polygonal tools for this purpose.

Step 2: Apply Content-Aware Fill
With the text selection still active, go to Edit > Content-Aware Fill. In the Content-Aware Fill workspace, adjust settings like Sampling Area and Adaptation to fine-tune the fill. If necessary, use tools like the Spot Healing Brush Tool or the Clone Stamp Tool to refine the edges of the filled text. Finally, save your image.

Bonus Tutorial: How to Put an Image on Another in Photoshop?
Sometimes, it becomes vital to put one photo on top of another. But the question is, how can we do that? Here is the step-by-step guidance to use this technique easily:

Step 1: Open the Image
Open the base image and the overlay image in separate windows. Press Ctrl+A to select the overlay image and then press Ctrl+C to copy the image.
Step 2: Resize the Image
Go to the base image window. Now, paste the copied overlay image by pressing Ctrl+V. The new photo will appear as a new layer on top of the base image. Position and resize the overlay image by pressing Ctrl+t.
Step 3: Adjust Blending and Save
Then you can adjust the blending, opacity, and refine edges according to your requirements.

Final Thoughts
The content-aware fill in Photoshop is a helpful tool for professionals. You can use this versatile tool for different purposes, not just removing unwanted objects. Yet, practice can make you perfect in using this tool. Practice the above-mentioned techniques to get top-quality photos. Moreover, you can hire a professional editor like Clipping World to edit a large quantity of articles. They offer high-quality services at affordable prices. Check them out now.