When it comes to selling clothing online, clothing product photography can make or break your business. Since customers can’t touch, feel, or try on your products, high-quality images become your most powerful sales tool. The right photos can build trust, highlight quality, reduce returns, and drive conversions.
In this complete guide, you’ll learn everything you need to know about how to take clothing product photos—from gear and lighting to preparation, photography styles, and editing tips.
What is Clothing Product Photography

Clothing product photography is a type of commercial photography focused on capturing apparel, accessories, and fashion items in a way that appeals to shoppers. These photos are used for eCommerce websites, social media, lookbooks, and advertising.
The goal? To present each item in the best possible light, showing details like fabric, fit, and style—while staying consistent with your brand’s aesthetic.
Why Clothing Product Photography Matters

Your clothing images aren’t just visuals—they’re your virtual salespeople. Here’s why investing in great apparel photography is essential:
- Builds Trust: Clear, detailed pictures make shoppers feel confident.
- Boosts Sales: According to Shopify, 90% of customers think photo quality is very important when deciding what to buy.
- Reduces Returns: Showing true colors and textures helps customers know what to expect.
Whether you’re using platforms like Shopify, WooCommerce, Etsy, or Amazon, your clothing product photos need to meet both technical and aesthetic standards to convert.
Types of Clothing Product Photography
Each photography style creates a different visual experience. Here are the most popular approaches in clothing product photography:
1. Flat Lay Photography
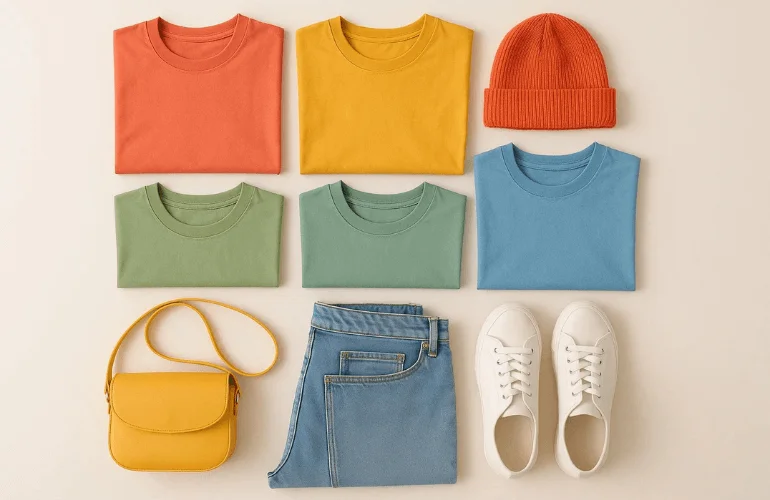
Lay garments on a flat surface and shoot from above. Great for showing outfit combinations or details. It’s affordable and ideal for beginners or DIY setups.
Tip: Use props like accessories or hangers for extra creativity.
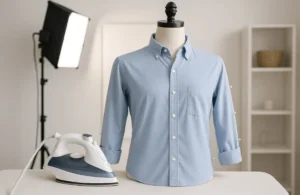
2. Ghost Mannequin Photography
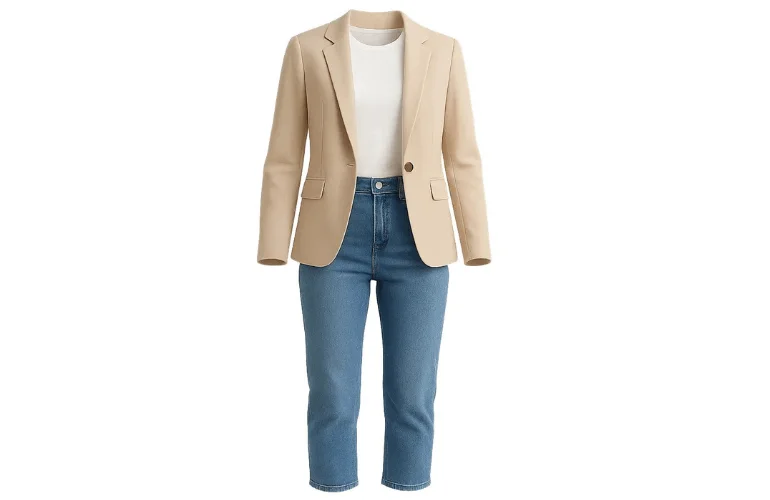
Photos are taken on a mannequin or model, and the form is removed during editing to create a 3D “floating” effect. This is the industry standard for professional clothing product photos.
Best for: T-shirts, jackets, dresses, and structured garments.
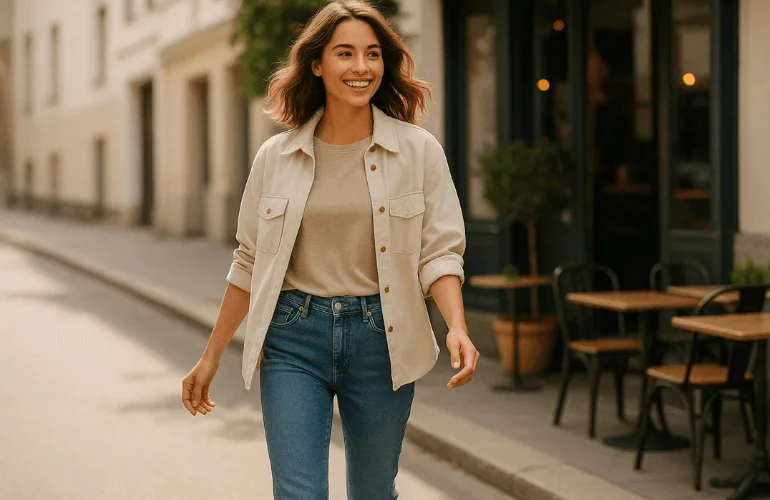
3. Model Photography

Using real people helps show the fit, style, and movement of your apparel. It also adds emotional connection and human appeal to your brand.
Pro tip: Work with models that match your target audience.
4. Lifestyle Photography
Capture your clothing in real-life settings—such as parks, cafes, and city streets. This helps with brand storytelling and is perfect for social media and lookbooks.
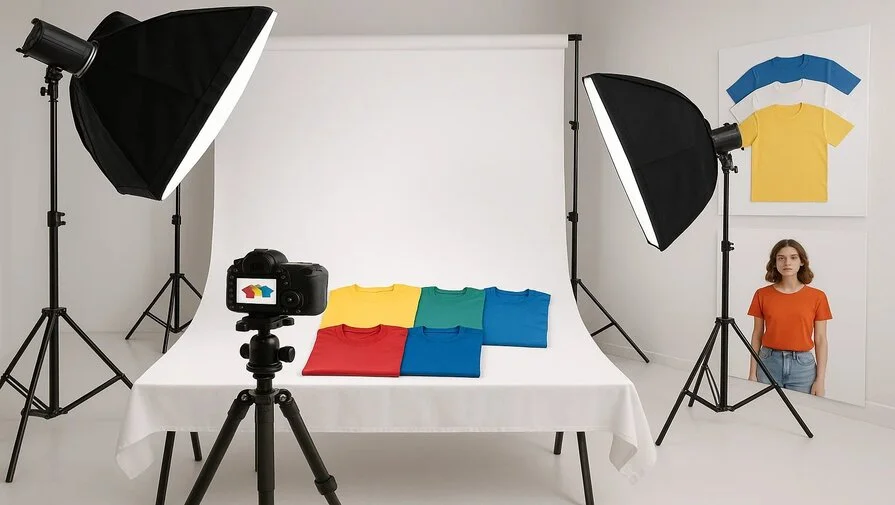
Must-Have Equipment for Clothing Photography
You don’t need an expensive studio to take amazing clothing product shots. Start small with this gear list:
| Category | Equipment | Use / Notes |
| Camera | – DSLR or mirrorless (e.g., Canon EOS R, Nikon D750) – Modern smartphone | Ideal for sharp, high-quality photos; smartphones work for budget setups |
| Lens | – 50mm – 85mm – Macro lens | 50mm for flat lay/mannequin shots, 85mm for portraits, Macro for fabric detail |
| Lighting | – Natural light – Softboxes / LED panels – Reflectors | Natural light is free; softboxes/LEDs give consistent lighting; reflectors reduce shadows |
| Backgrounds & Tools | – White / neutral backdrop – Tripod – Garment steamer – Clips & pins | Backdrops create clean visuals; tripod ensures steady shots; steamer removes wrinkles; clips/pins help styling |
How to Prepare Clothes for a Product Shoot
Well-prepared clothing makes editing easier and photos look more professional.
- Wash and Steam – Remove wrinkles and creases.
- Inspect Carefully – Check for stains, loose threads, or damage.
- Style Neatly – Use pins, clips, or tape for a tailored appearance.
- Organize by Category – Group clothes by type or brand to streamline workflow.
Tip: Prep everything a day before the shoot to save time. A little preparation goes a long way in making clothes appear polished and professional.
Clothing Photography Setup Ideas (Even on a Budget)
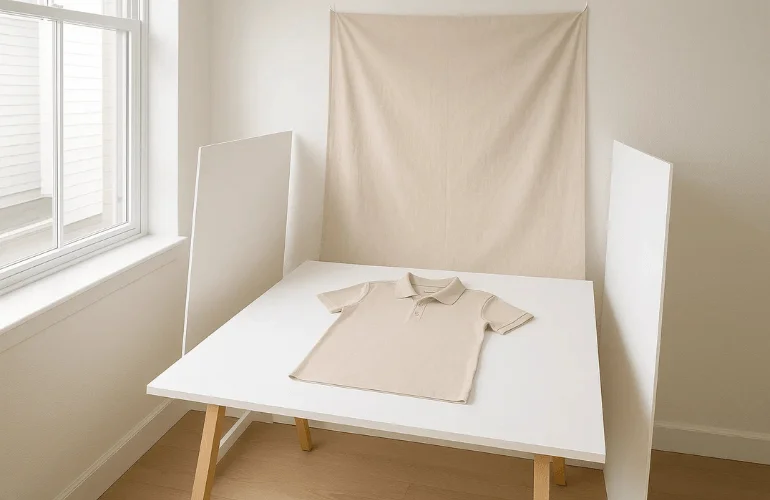
Starting small? No problem. Here’s how to create a budget-friendly clothing photography setup:
- Use a large table or floor space for flat lay shots.
- Set up near a window for free, natural light.
- Use white foam boards as reflectors.
- DIY your backdrop with seamless paper or fabric.
As you grow, you can upgrade to softbox kits, backdrops, and full lighting rigs.
Editing Clothing Product Photos for a Professional Look
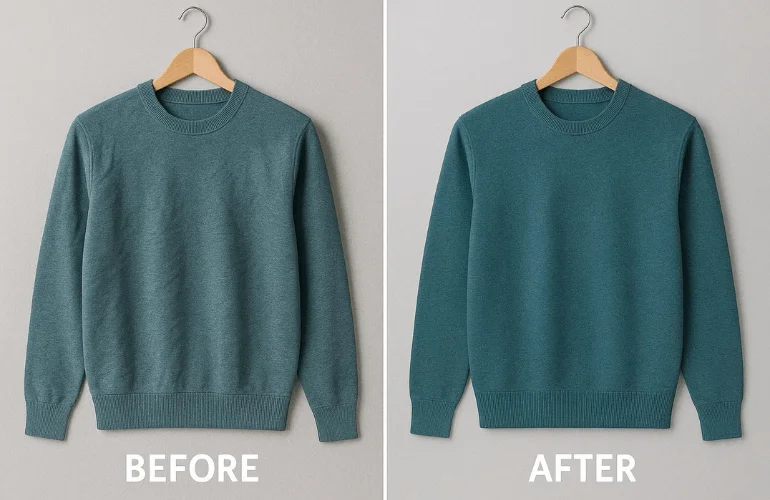
Post-processing is where your photos go from good to great. Even basic editing can make a huge difference in professionalism and clarity.
Common Editing Tasks:
- Background removal or whitening
- Color correction and exposure balance
- Wrinkle removal and smoothing
- Cropping and resizing to platform standards
- File format optimization (JPEG, WebP, PNG)
Pro Tip: Use professional editors or tools like Photoshop, Lightroom, or hire services like Clipping World to save time.
Optimizing Clothing Photos for eCommerce
Each platform has its own guidelines. Here’s how to make sure your photos meet them:
| Platform | Minimum Size | File Type | Background |
| Shopify | 2048 x 2048 | JPEG/PNG | White or light |
| Amazon | 1000 x 1000+ | JPEG | Pure white (#ffffff) |
| Etsy | 2000+ width | JPEG | Clean and styled |
Tip: Add multiple angles, close-ups, and full-view shots to help customers visualize the product better. You can also check Unsplash for inspiration on professional clothing photography layouts.
Pro Tips to Improve Clothing Product Photography
To create high-converting clothing product photos, consistency is key. Make sure you’re using the same lighting setup, background, and camera angles across your entire product line to maintain a cohesive brand look.
Always capture multiple angles of each garment—front, back, side, and close-up shots—to give shoppers a complete view and help them make confident purchase decisions.
Highlighting texture is equally important, especially for materials like knits, denim, or lace. Be sure to show fabric details and stitching that reflect quality. Before committing to a full shoot, test your lighting and composition with a few items and adjust as needed to avoid repeating mistakes.
Finally, consider A/B testing different image styles on your website or ads to find out which types resonate best with your audience and lead to higher conversions.
Ready to Elevate Your Clothing Product Photography?
Whether you’re a startup brand or a growing fashion business, great clothing product photography will elevate your eCommerce game. Clear, crisp, and compelling apparel photos aren’t a luxury—they’re a necessity.
Don’t have time to shoot or edit yourself? Clipping World offers expert eCommerce apparel photo editing services, including ghost mannequin effects, starting at just $0.20/image. From invisible models to flawless retouching, we help your clothing products shine. Get a Free Trial Today.
Conclusion
Great product photos don’t require a massive budget — just the right techniques and preparation. Whether you’re experimenting with DIY clothing photography at home or building a professional studio, the key is consistency and attention to detail.
By following this guide, you’ll be equipped to create stunning apparel images that boost sales, reduce returns, and strengthen your brand’s online presence.
Frequently Asked Questions
A seamless white background works best for e-commerce. For storytelling, use neutral fabrics or lifestyle setups
Absolutely. Combine natural light with a tripod for stability, and you can achieve professional results.
Use extra lighting and slightly overexpose your shot. Adjust during editing to reveal textures.
Two Softboxes positioned at 45-degree angles with a reflector to reduce shadows.